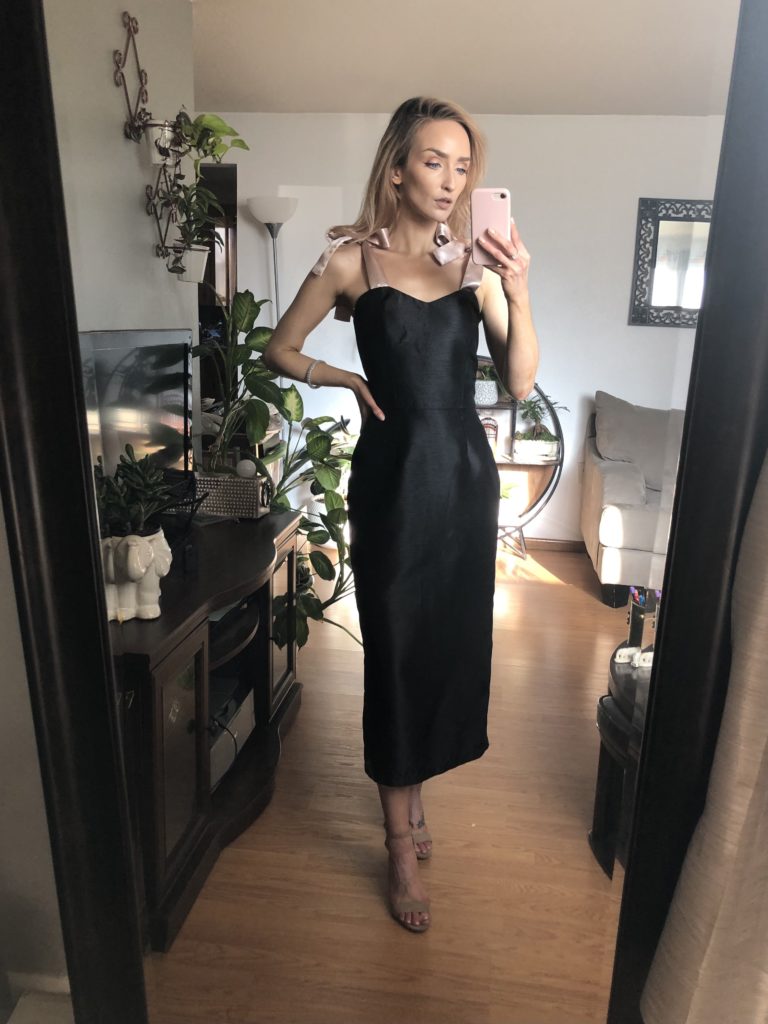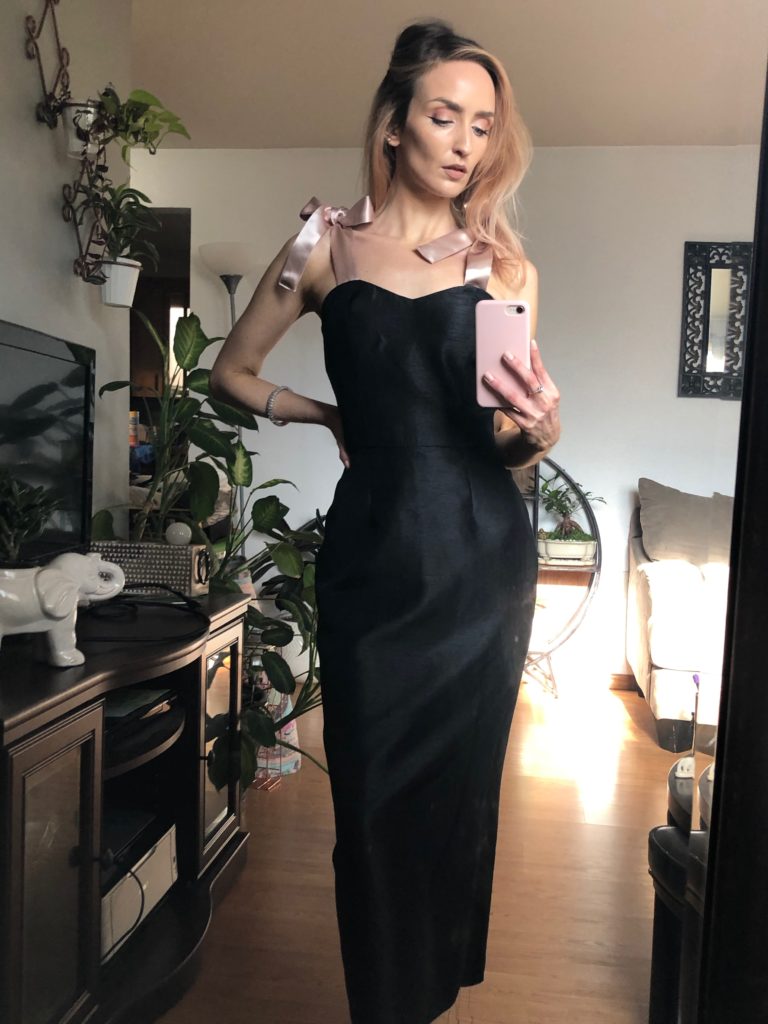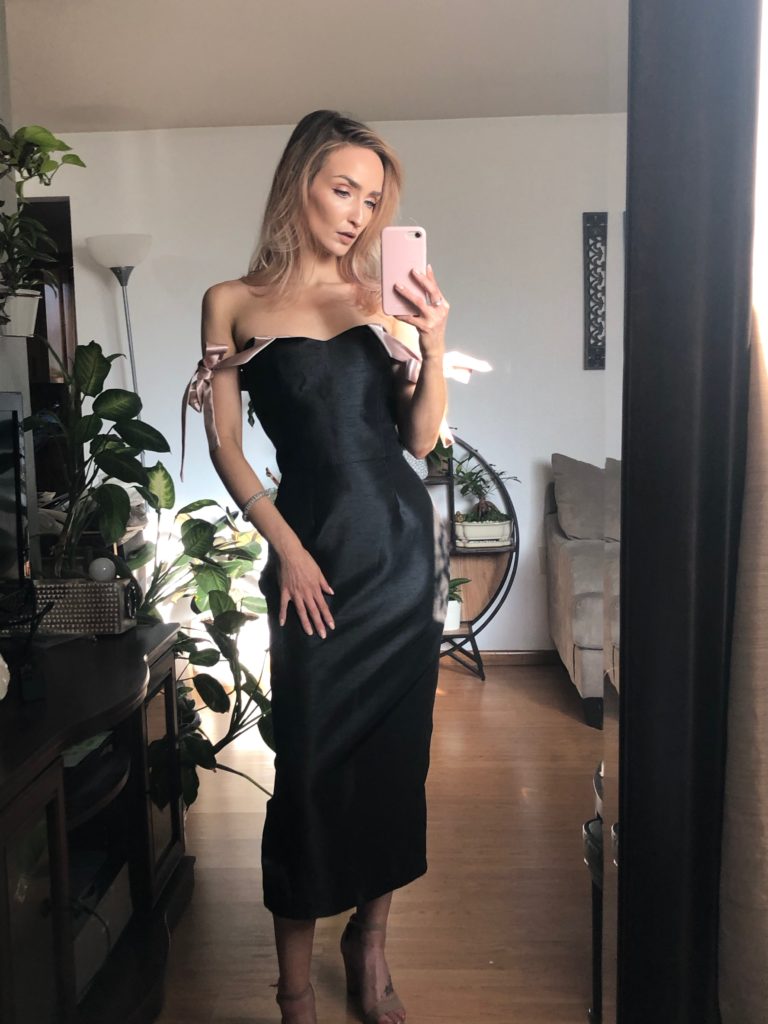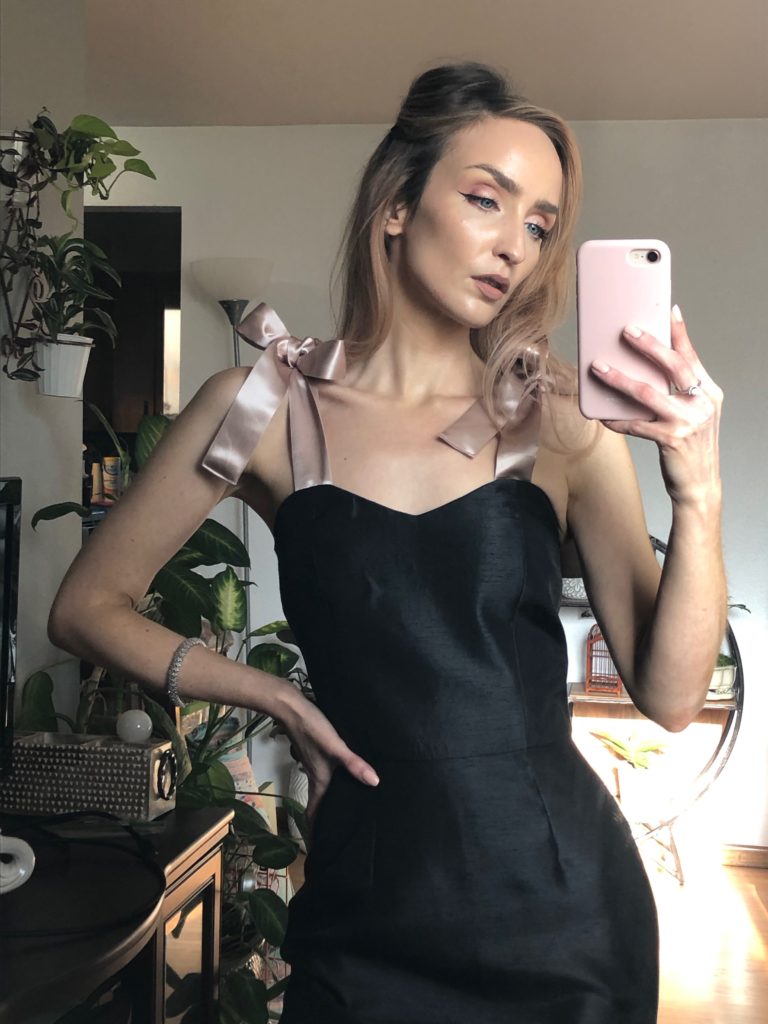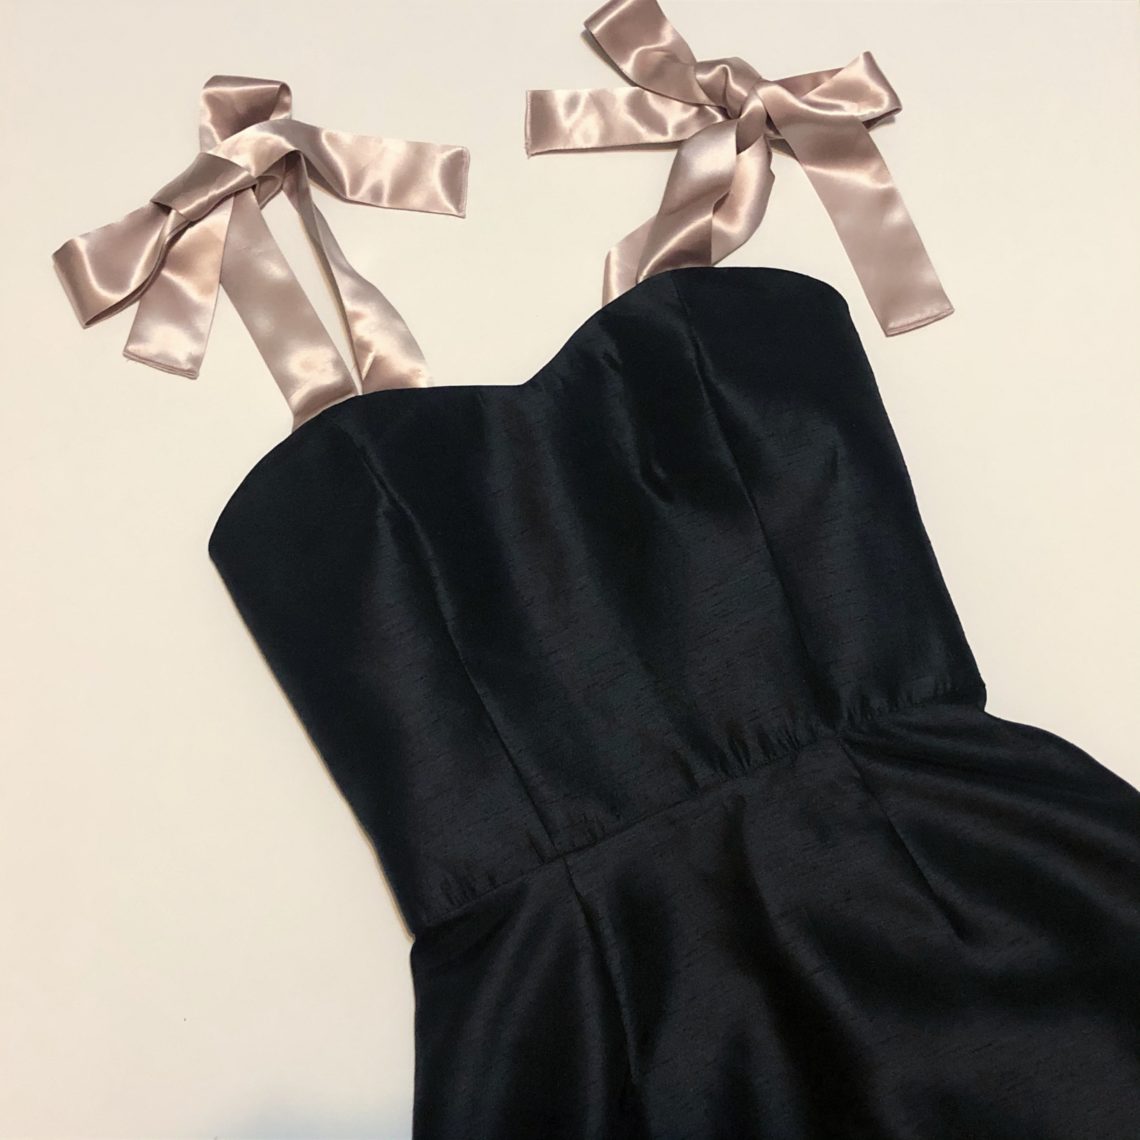
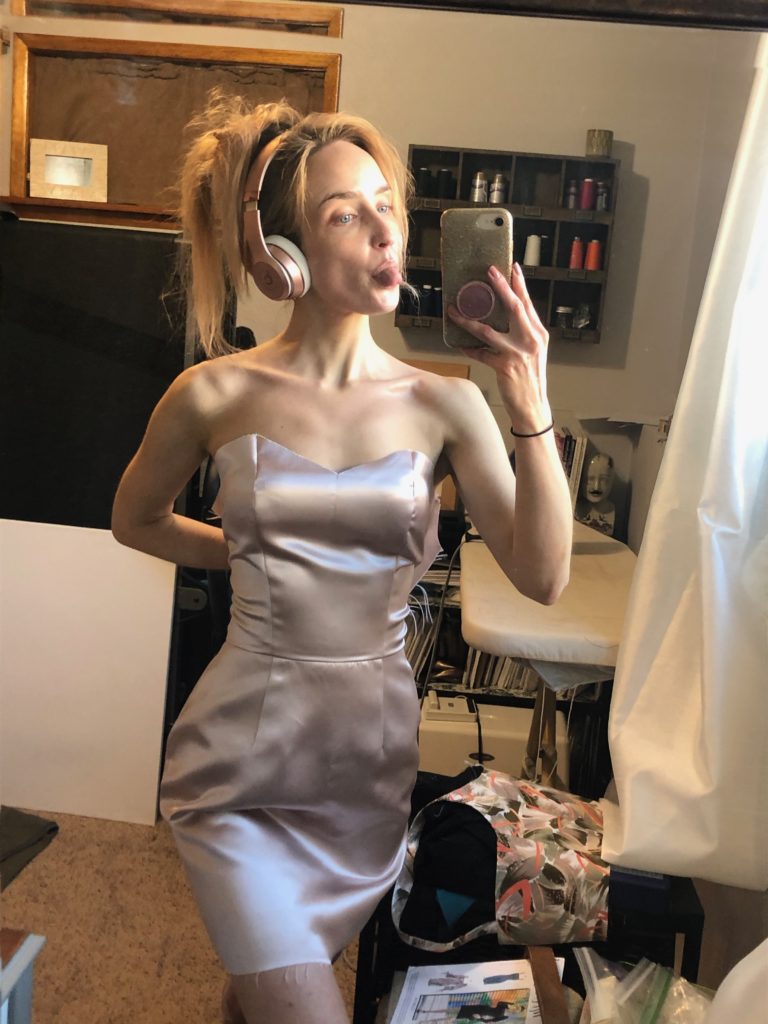
Hi everybody! I hope everyone is staying safe. I’m not celebrating any holidays in person this year buuuut if I was I would be wearing this dress. One of my favorite things to do as a child was play dress up. I still enjoy that even if I have nowhere to be right now. If you follow along on my IG you’ll already know this dress is based off the Russian label Larne. Even though I don’t need a party dress I couldn’t stop thinking about it. I can’t deny what my heart desires.

For the pattern I used McCall’s 7654 in the strapless view and fabrics I bought at the thrift shop. M7654 is a good basic pattern you could make various styles of dresses out of. My measurements have shifted currently my bust is 31in, waist 24in, hip 34in. In the sizing I went with a 6, but I did take the back bodice in by the zipper slightly to fit my frame and lengthened the skirt.
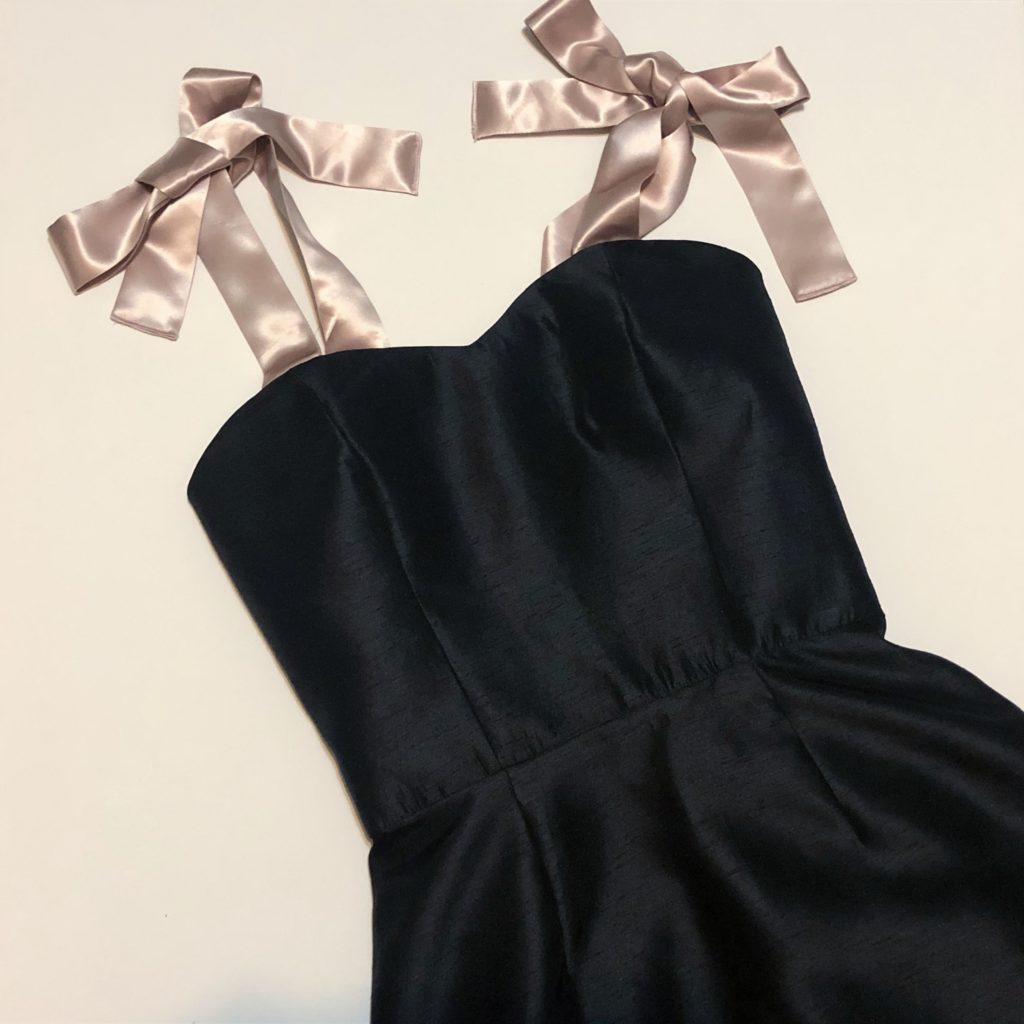
Bodice
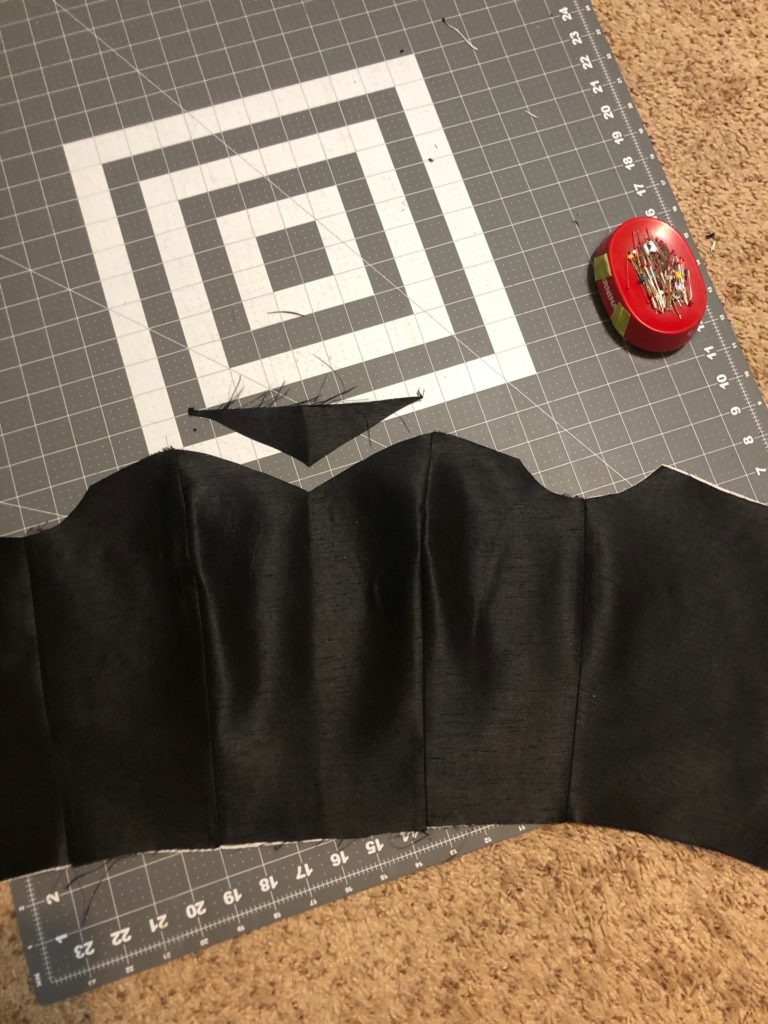
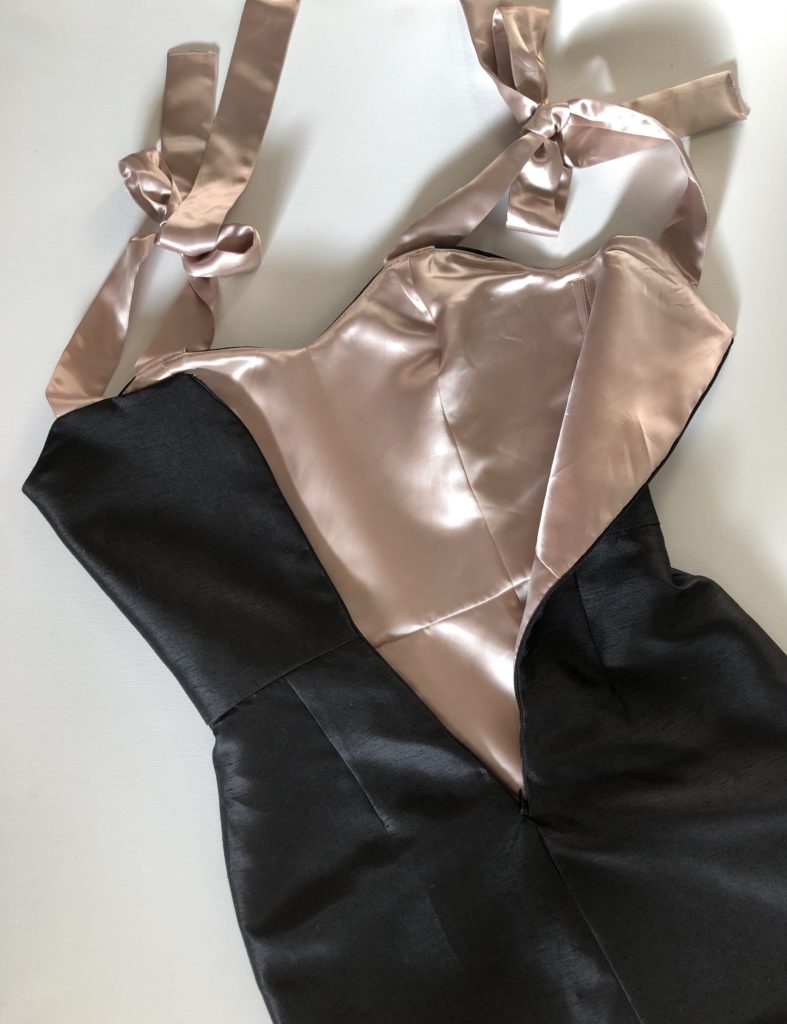
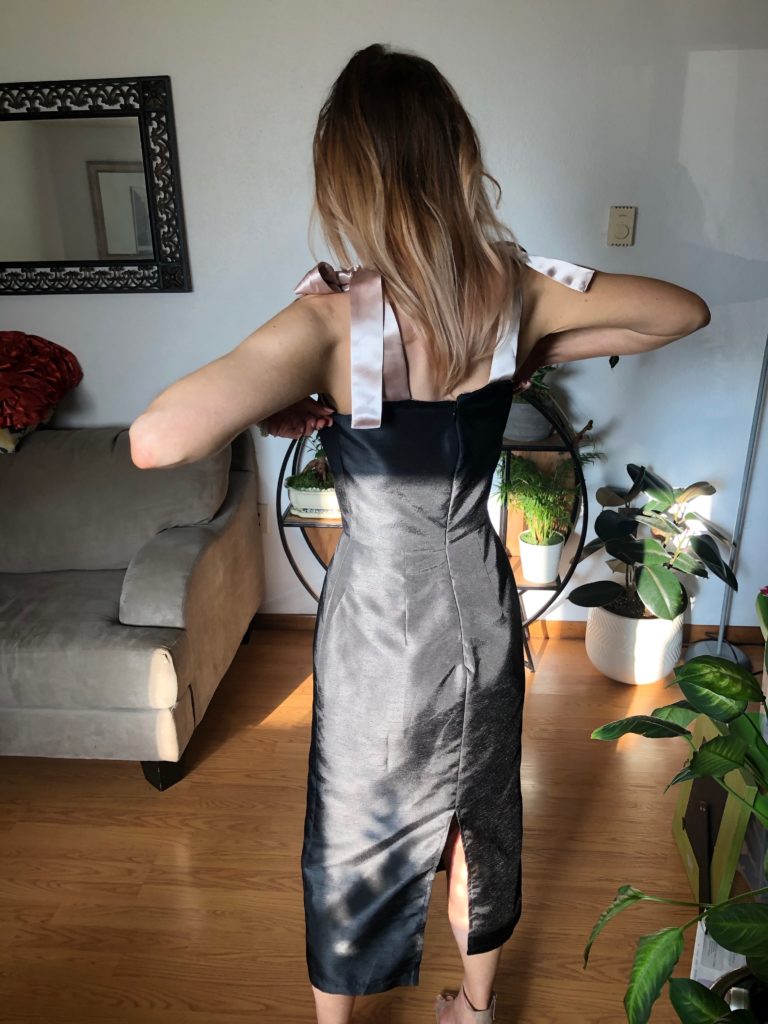
Altering the strapless to a sweetheart neckline is fairly simple. I forgot to get more pictures of the process but I will explain. Once the main fabric of the bodice had been interfaced, sewn and clipped as by the pattern instructions I was ready to make it a sweetheart shape. To do this, I folded the bodice wrong sides together, pinning along the seams, and then used a blouse I had to shape the cut. The main thing I do is have the top curve of the sweetheart meet at the top princess seam. After the cut, save the piece you removed so you can shape lining fabric the same.
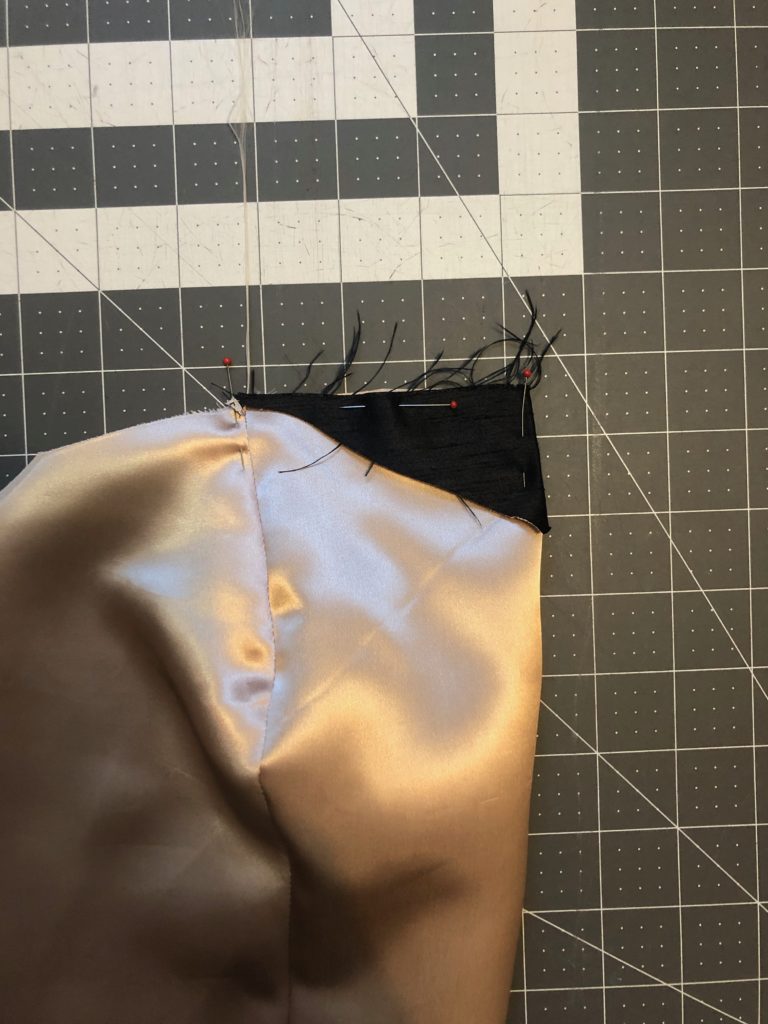
The lining fabric I sewed as per the pattern instructions. Just altering the neckline. Ive sewn boning into the side seams of the bodice. If you need more support in your bust you could easily add more boning along the princess seams (curving your boning with the seam) and even hand sew bra cups into the lining.
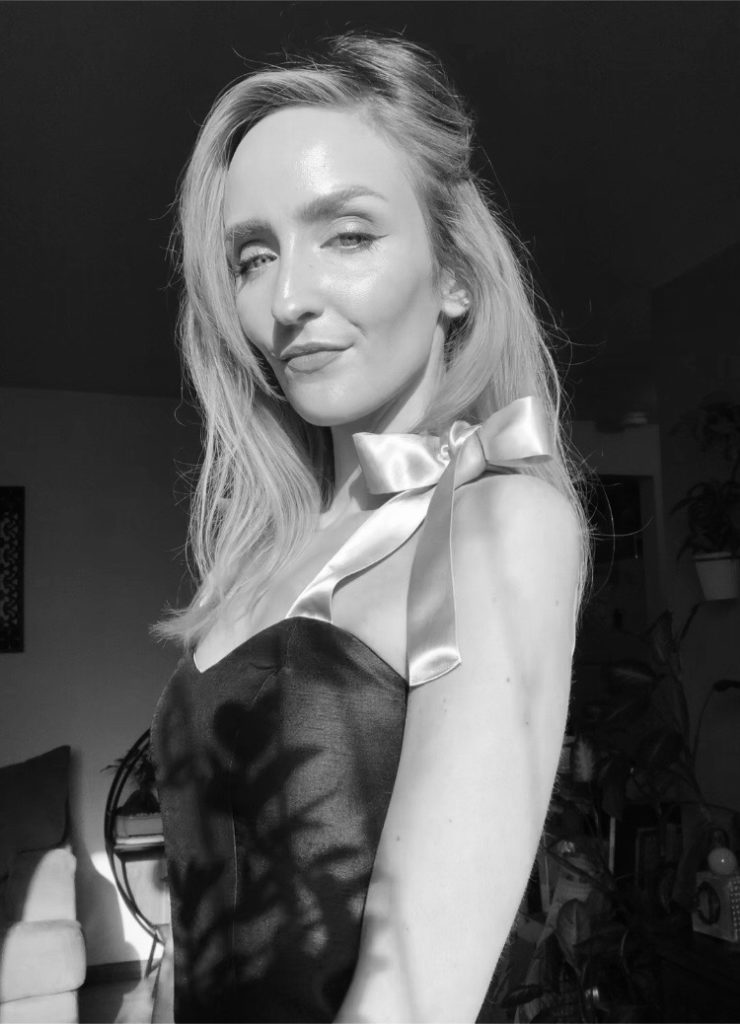
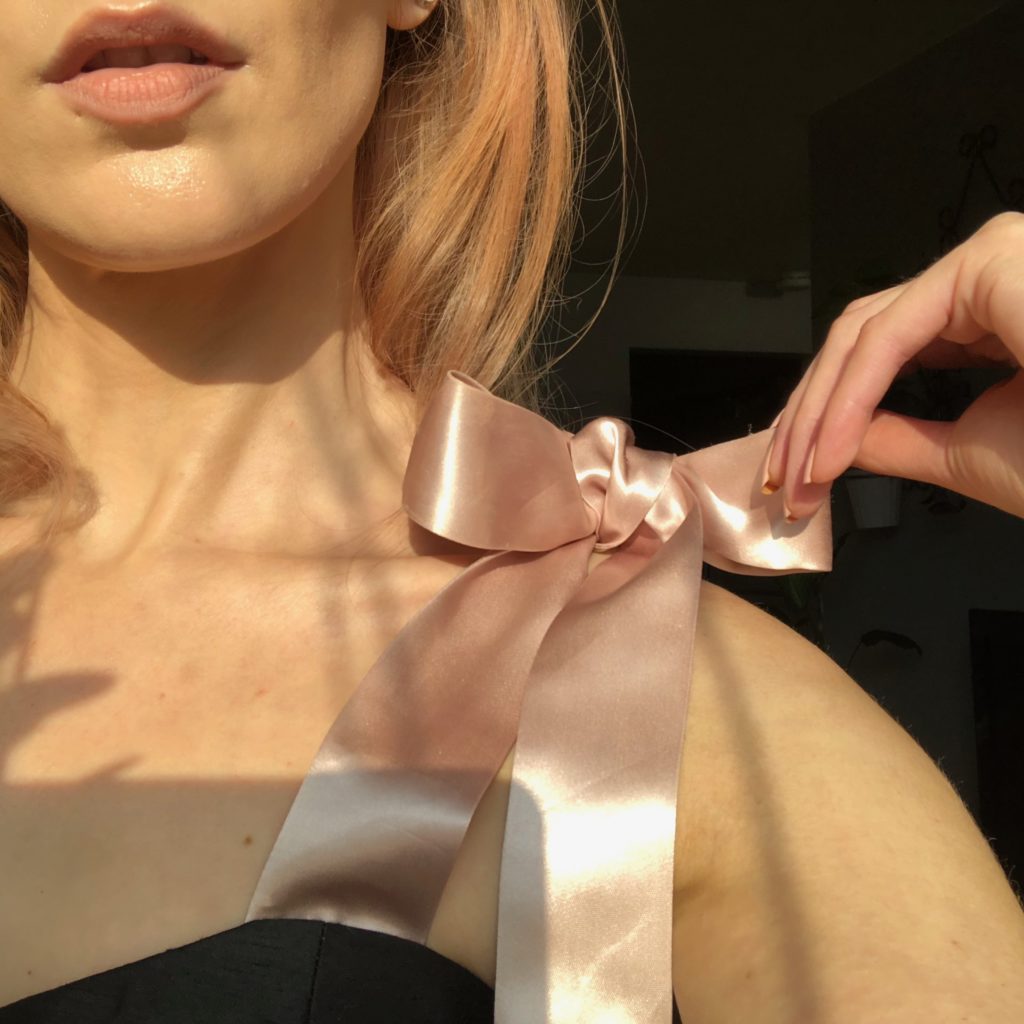
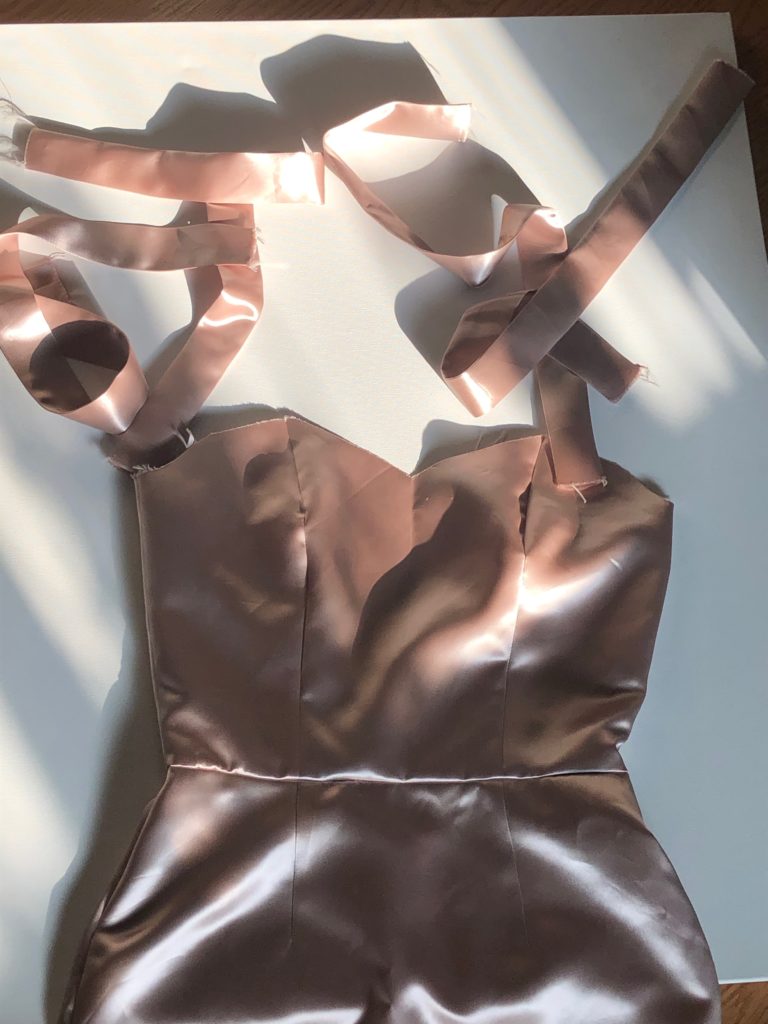
Tie Straps

The tie straps finished measurements are 1.5in wide and maybe 25in long. To cut the straps I did 4in wide straps by 25in. Sewing the ties right sides together at a 1/2in seam allowance. Before I flipped my ties I used the edge of my iron to press open the seam allowance. I only ironed the seam as I didn’t want to create a crease in the fabric. Ironing helps the seam lie flatter after it has been pulled through. I used my loop turner to turn the ties to the right side, you could easily use a safety pin if you don’t have a loop turner. Once pulled through I ironed the tie straps flat. The outside ends were tucked in and sewn for a clean finish.
Skirt
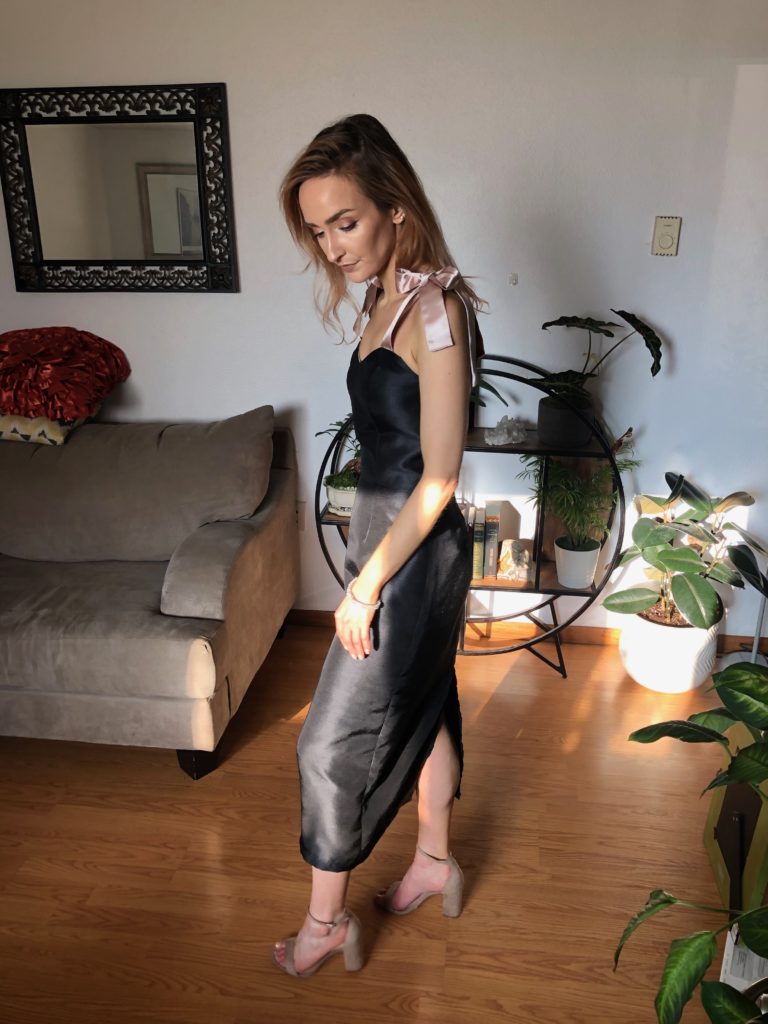
The skirt, again I forgot to get pictures during construction, I extended the pencil skirt an additional 8in with a 1in hem. (I’m 5’2″ for size reference.) Im really glad I went with the longer length, it has a very elegant vibe. Other than extending the length I sewed the skirt as per the pattern, keeping the slit in the back seam so I can walk proper. The lining of the skirt I sewed the same, but I kept it shorter than the back slit.
I love how this dress turned out. Makes me feel glamorous.