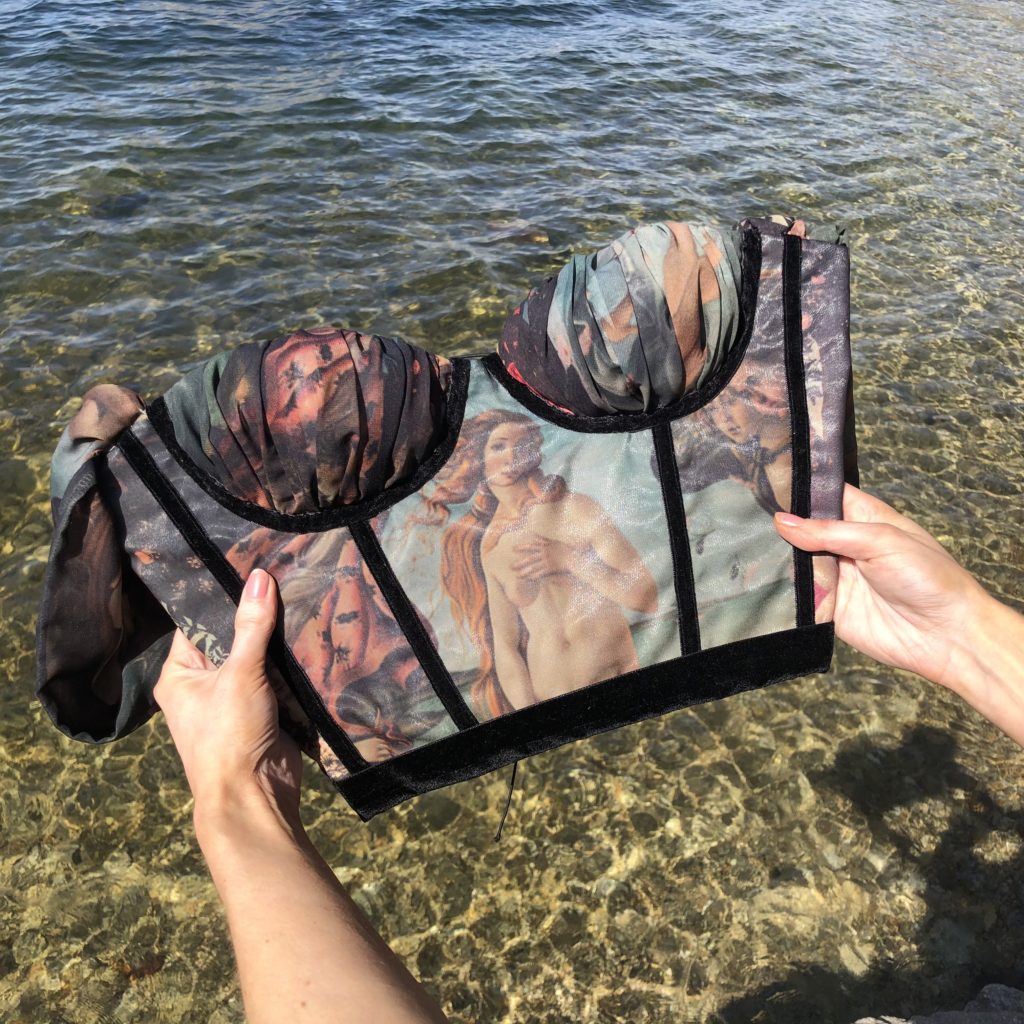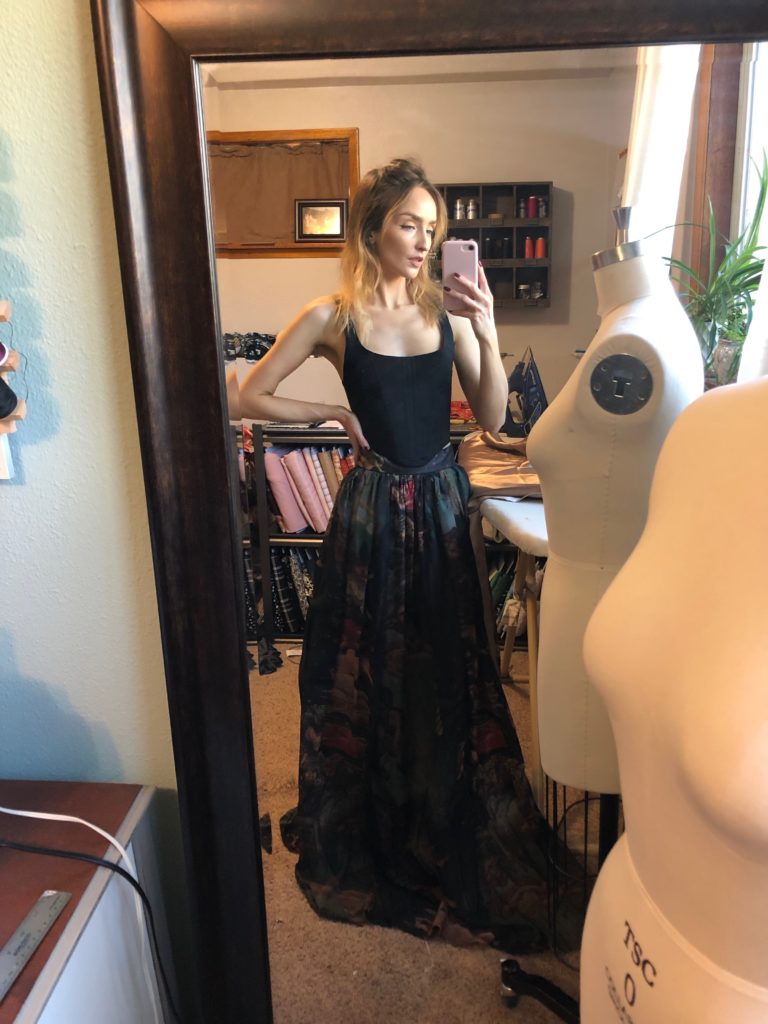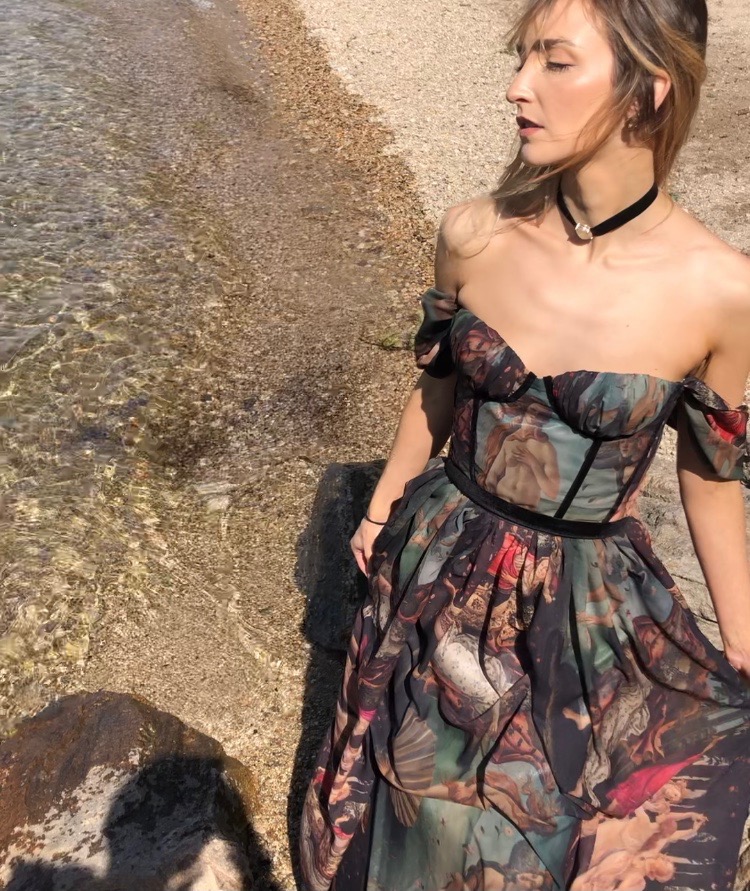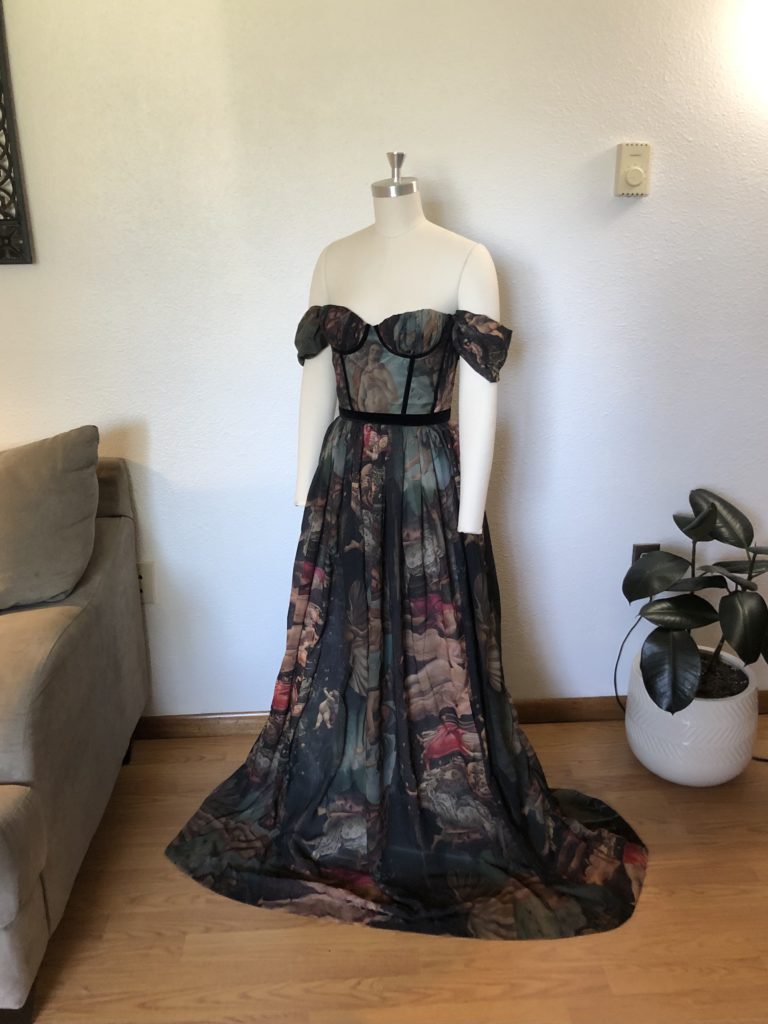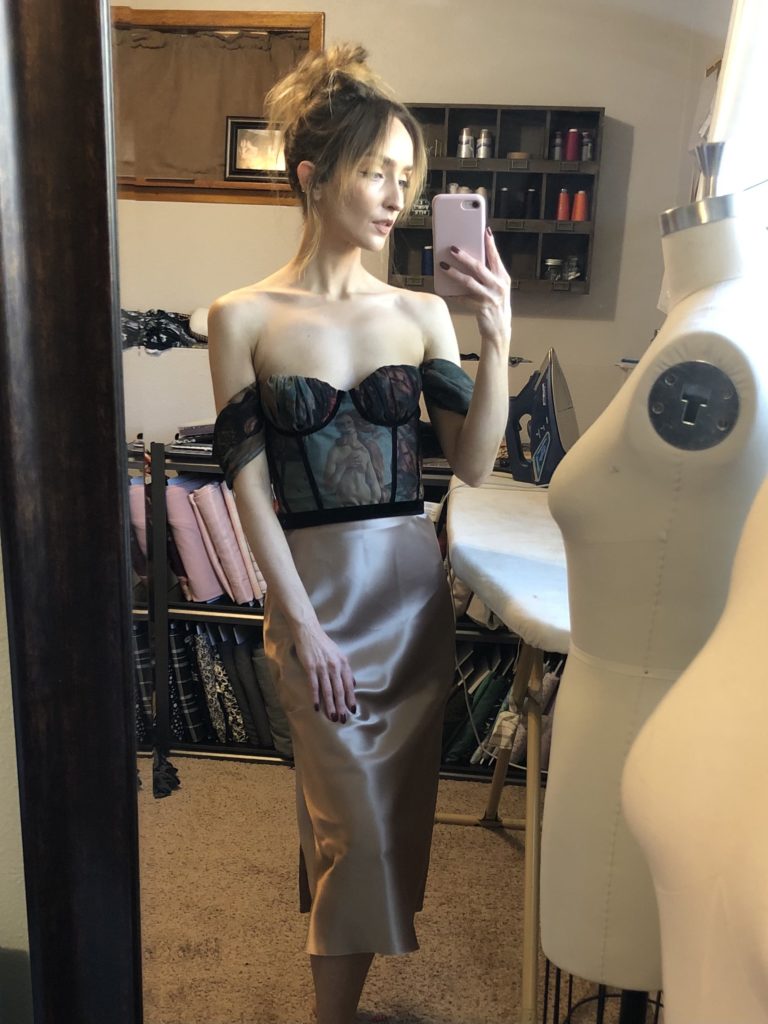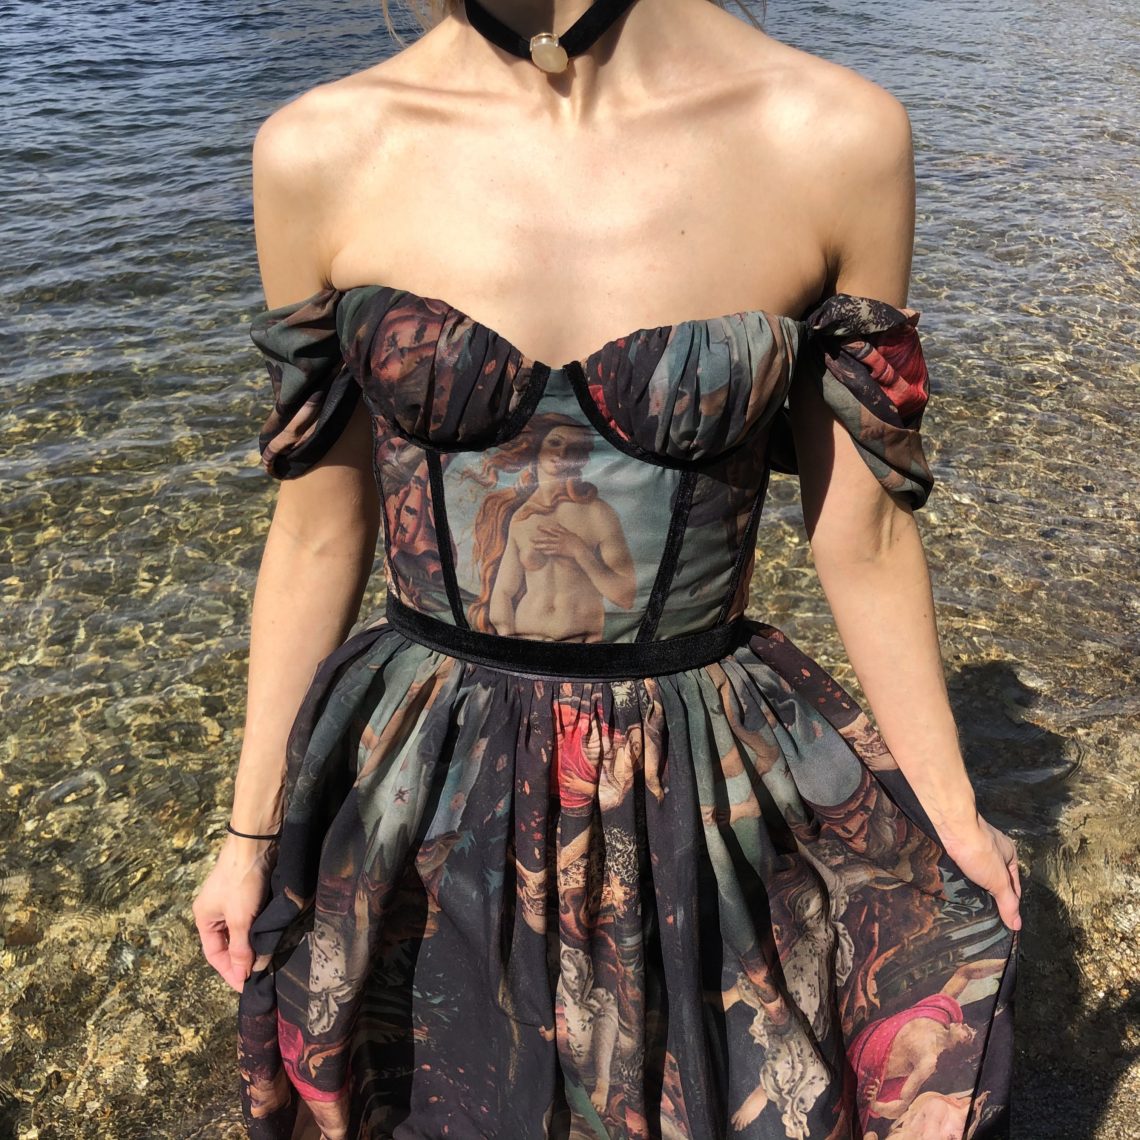
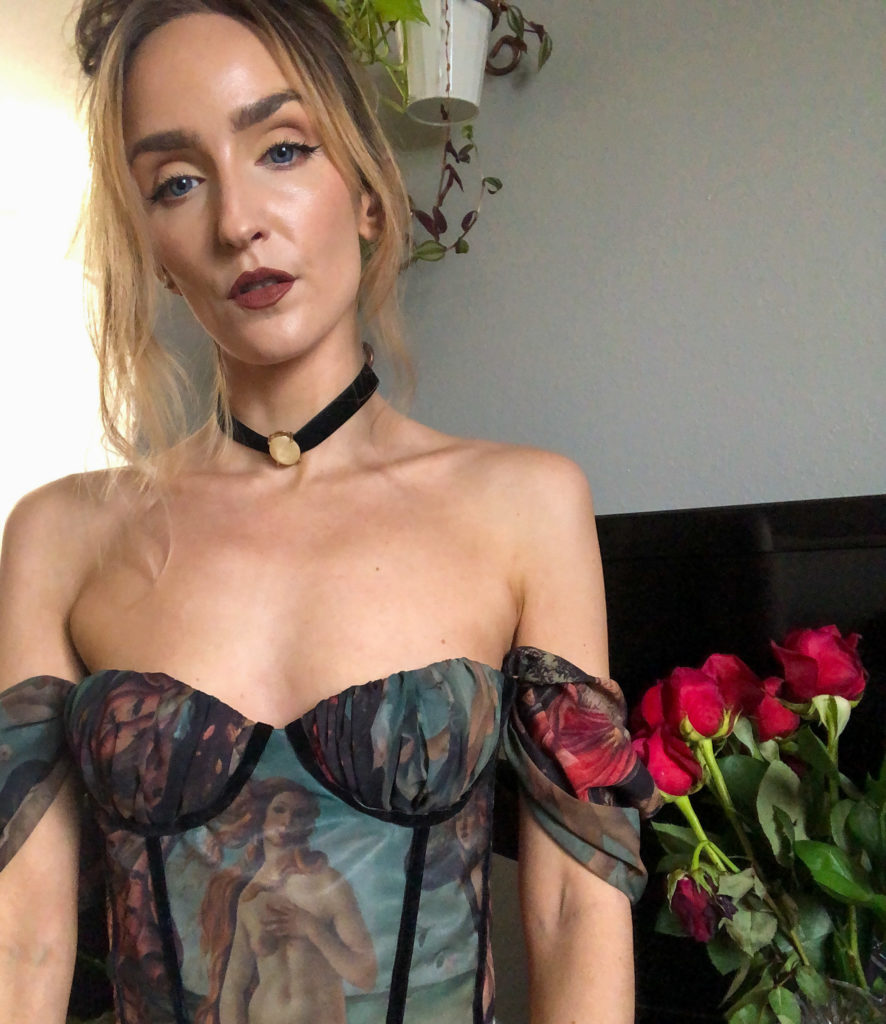
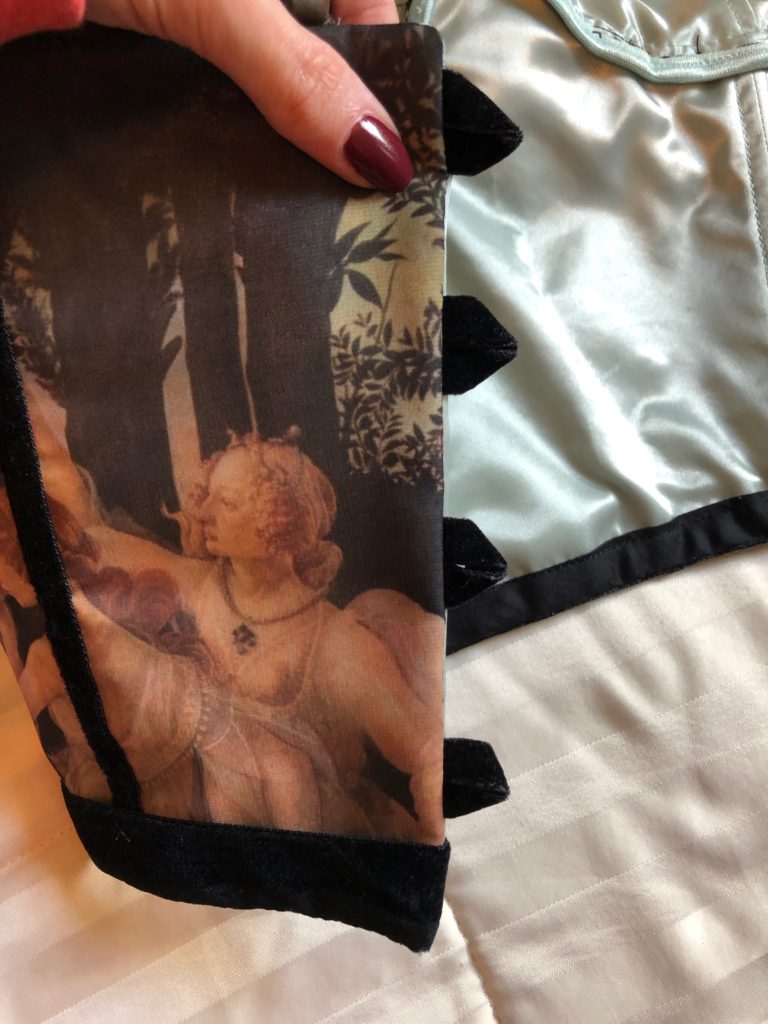
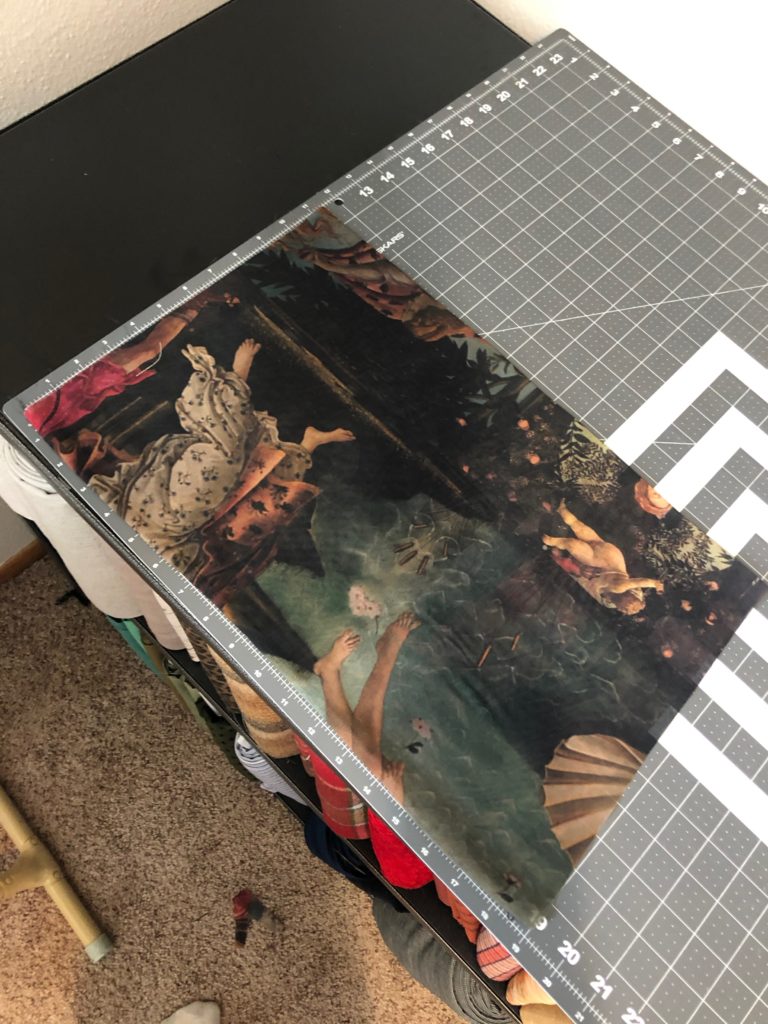
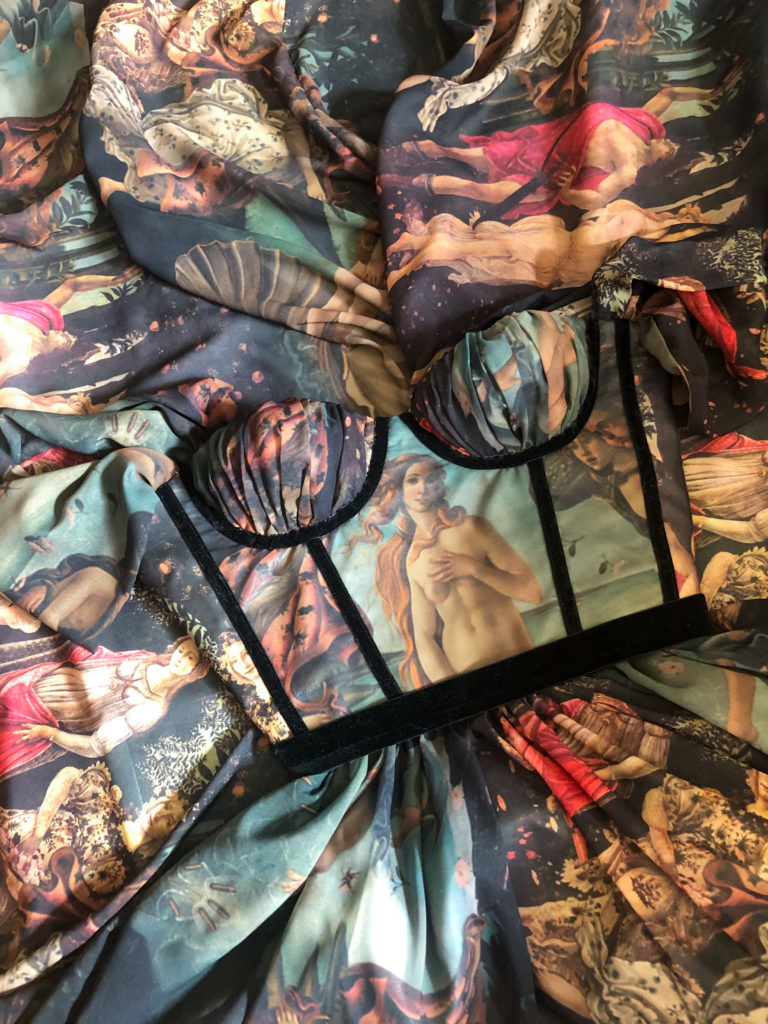
I’ve been obsessed with the Birth of Venus since I was a kid. My dad had an art book with that Botticelli painting and I remember being fascinated by it. Her hair, her freedom, the sea. I love it all. The revival of the Renaissance style fashion inspired me to create this. The fabric I purchased from Spoonflower. One of the main reasons I love Spoonflower is you can get any print on several different types of fabric. I chose a chiffon fabric for a lightweight flow. I bought 6 yards of the fabric. Also my ‘dress’ is actually a two piece set because I like the variety.
For the plan of the dress I knew I wanted a bustier style with gathered cup detailing. The rouching of the cups makes me think of the ridges of the shell Venus emerges from. And to mimic the gathering of the cups I also went with a gathered skirt. Starting with the base of the bodice I used the Rose Cafe Bustier pattern. This pattern is sized 0-20 and can be made with or without underwire. I have made this pattern before so be sure to test your sizing beforehand.
Bodice
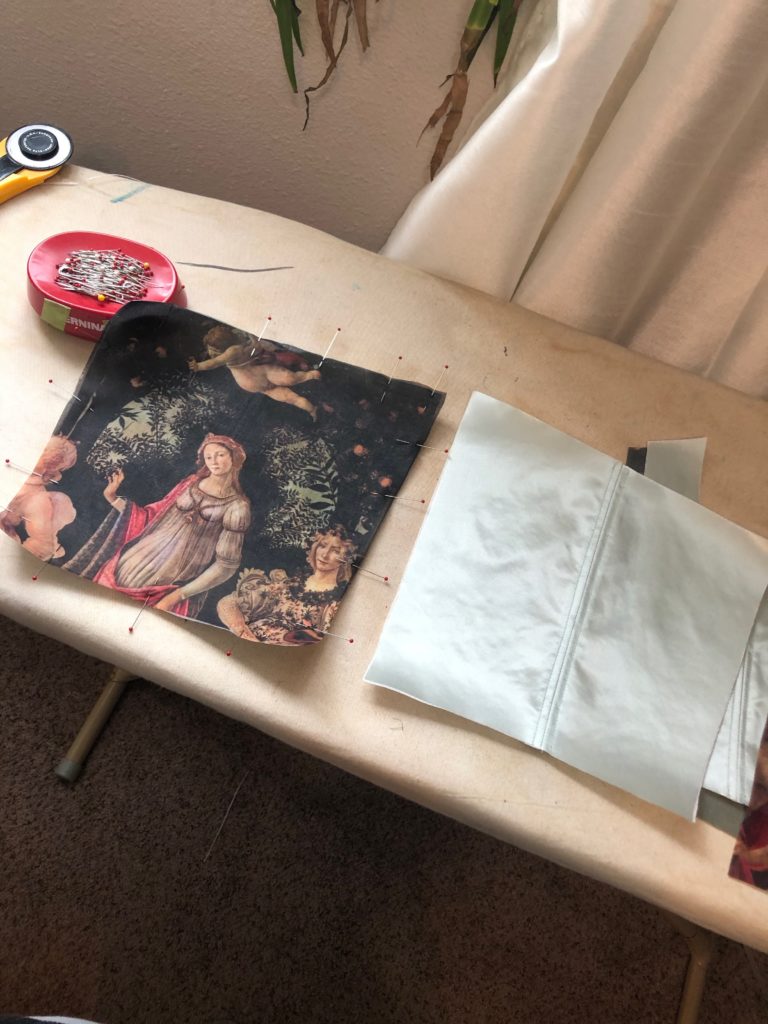
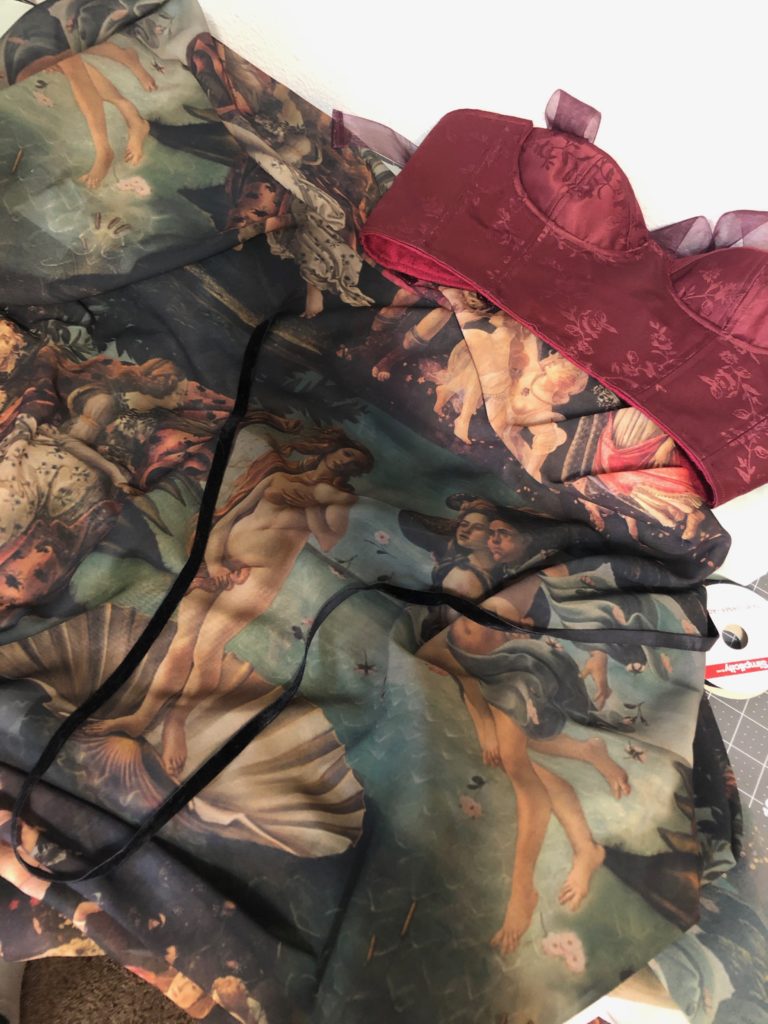
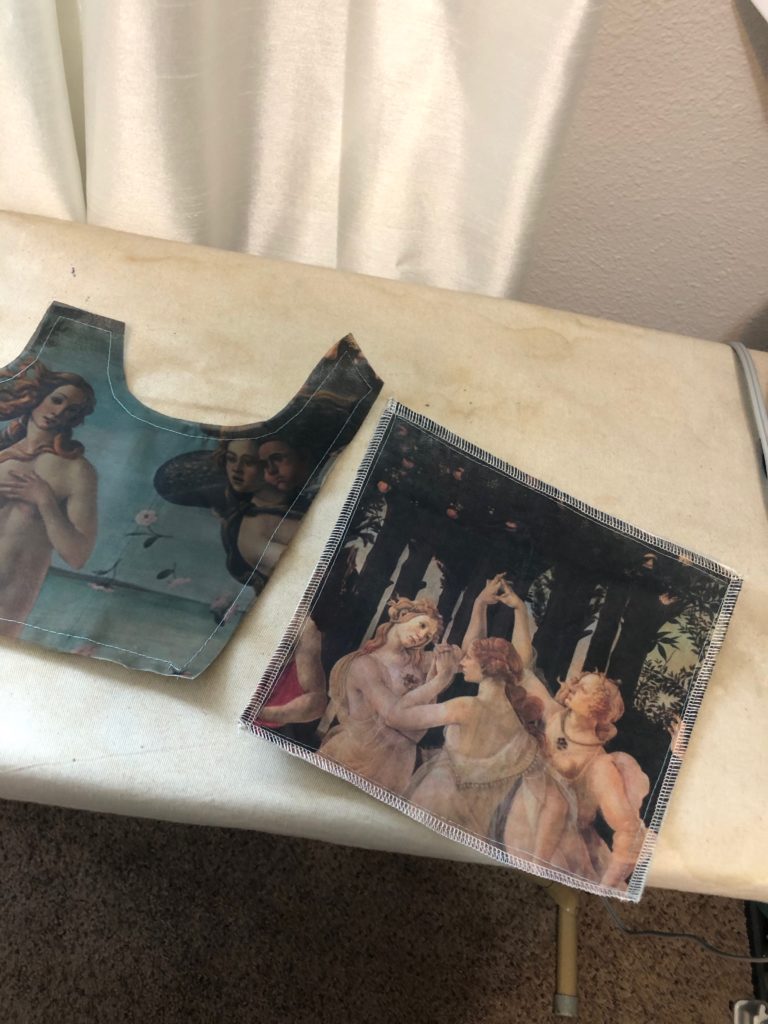
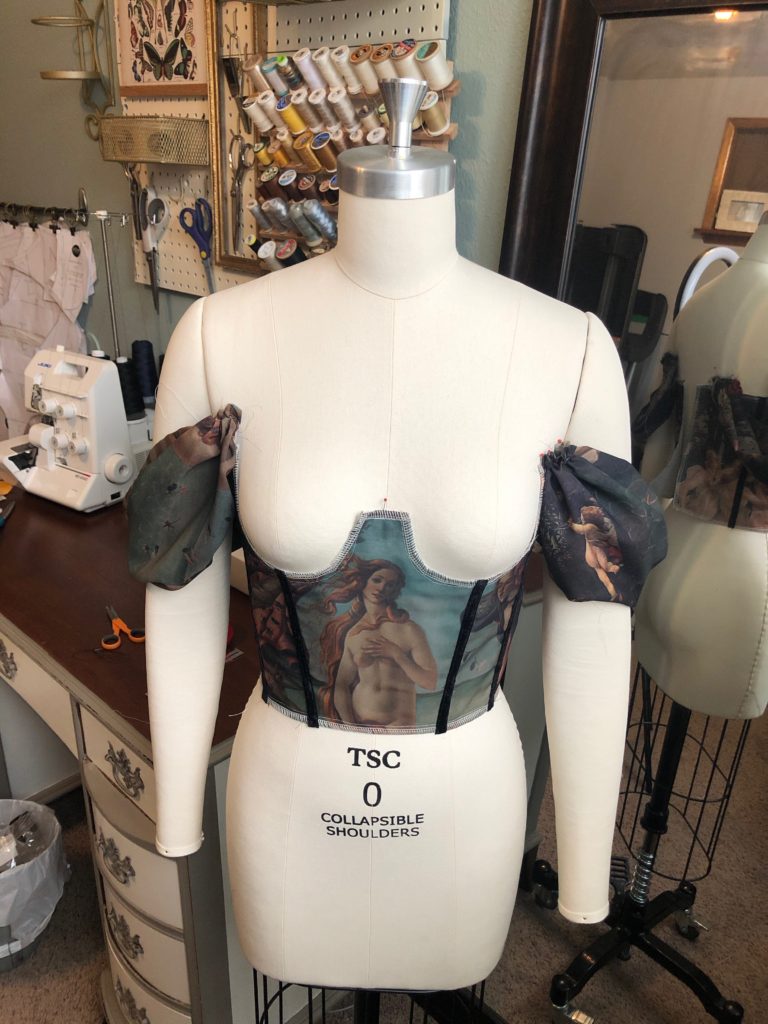
For the bodice I bought this before the sizing update so I cut a size XXS which I would guess is a 0. I extended the length 1/2in for my long torso. Since the chiffon is a sheer fabric I basted each main bodice piece to an underlying lining piece for stability. After that I serged the main pieces so there are no raw edges. So there are a total of three layers of fabric, two for the main and one lining layer. After sewing the main bodice piece together, I machined stitched decorative black velvet along the seam lines.
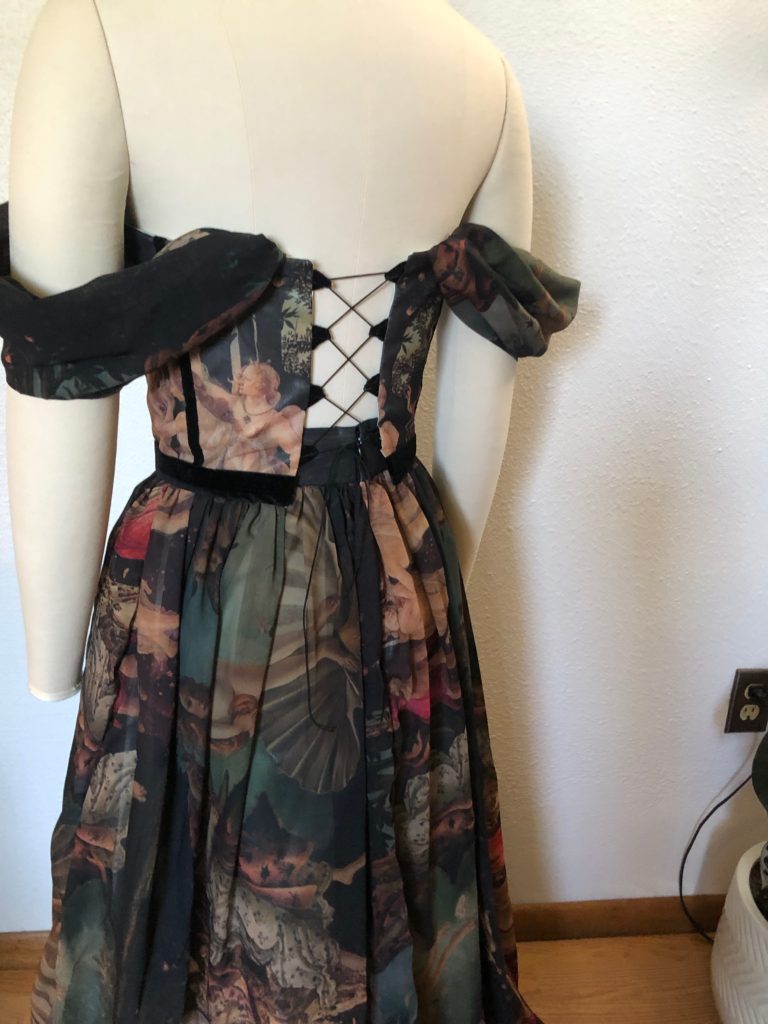
I stitched the lining pieces together and then sewed boning along each seam line. Additionally a piece of boning goes down the center of the liner bodice between the cups. Since mine is a corset top that laces up the back, I wish I would have put two more pieces of boning by the back closure for support. At this point do not sew the bodice main to the lining yet, if you want to add a draped sleeve. The sleeve seams are sandwiched between the main and liner bodice.
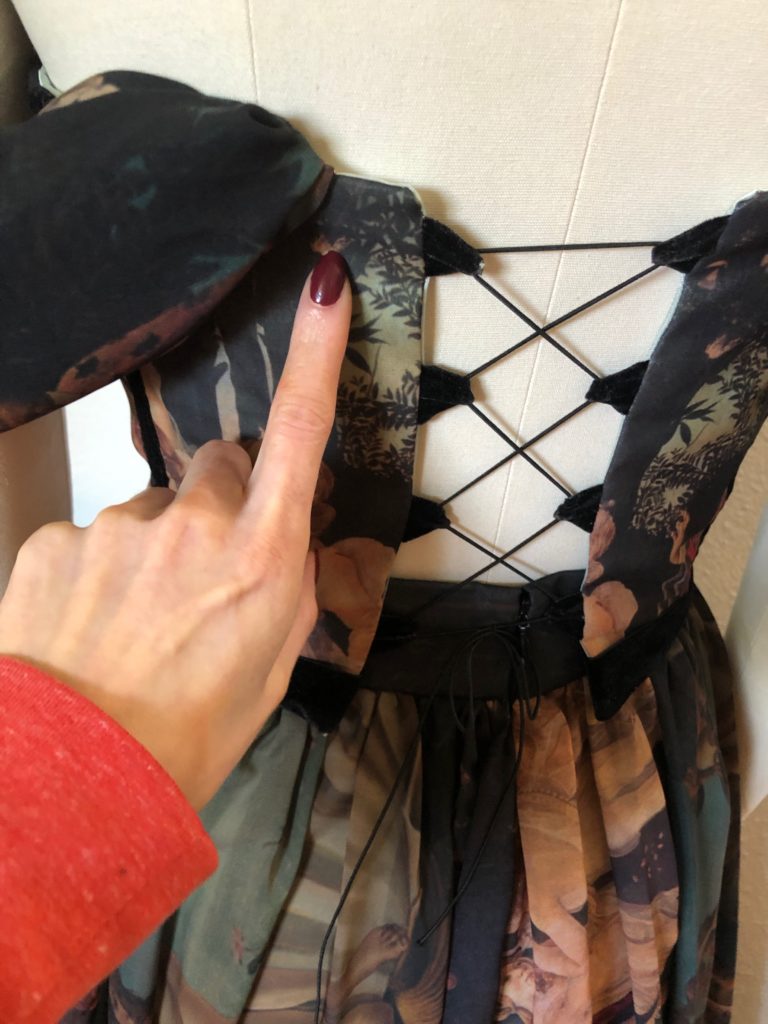
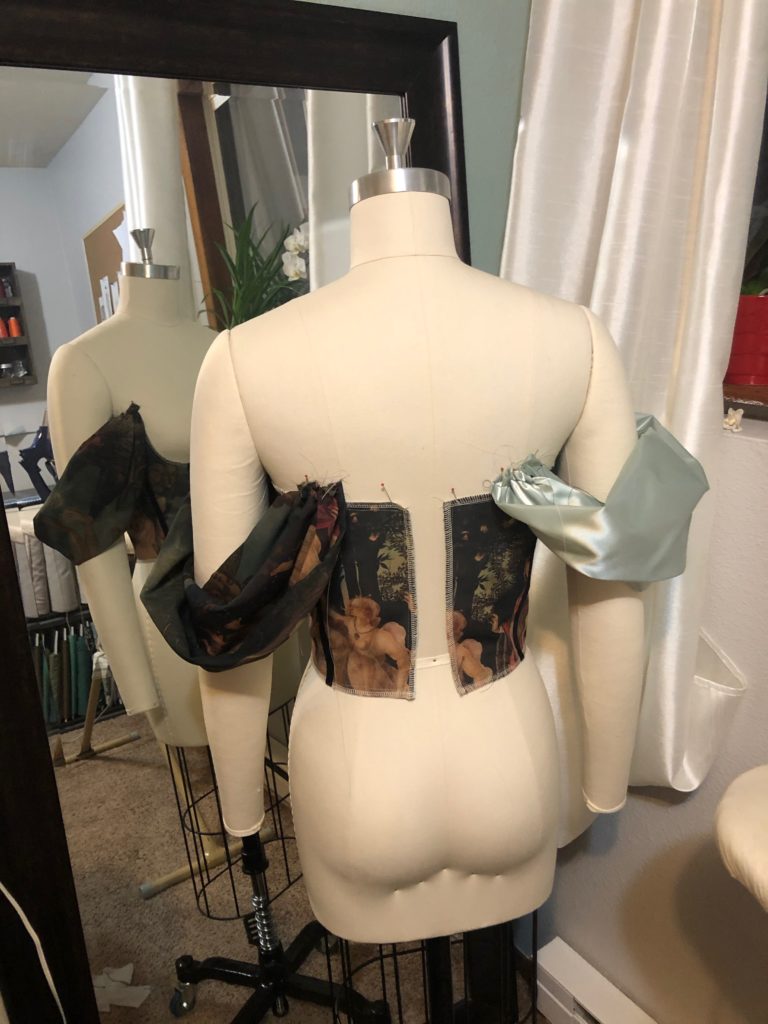
Before sewing the main and liner you should also consider what you want for the back closure. I used 3/8in velvet trim as loops for the back of this top. If you want a similar style now would be the time to install those to the main fabric back edges. However, if you want to do a zipper or grommets you can continue without this step.
Draping the sleeve
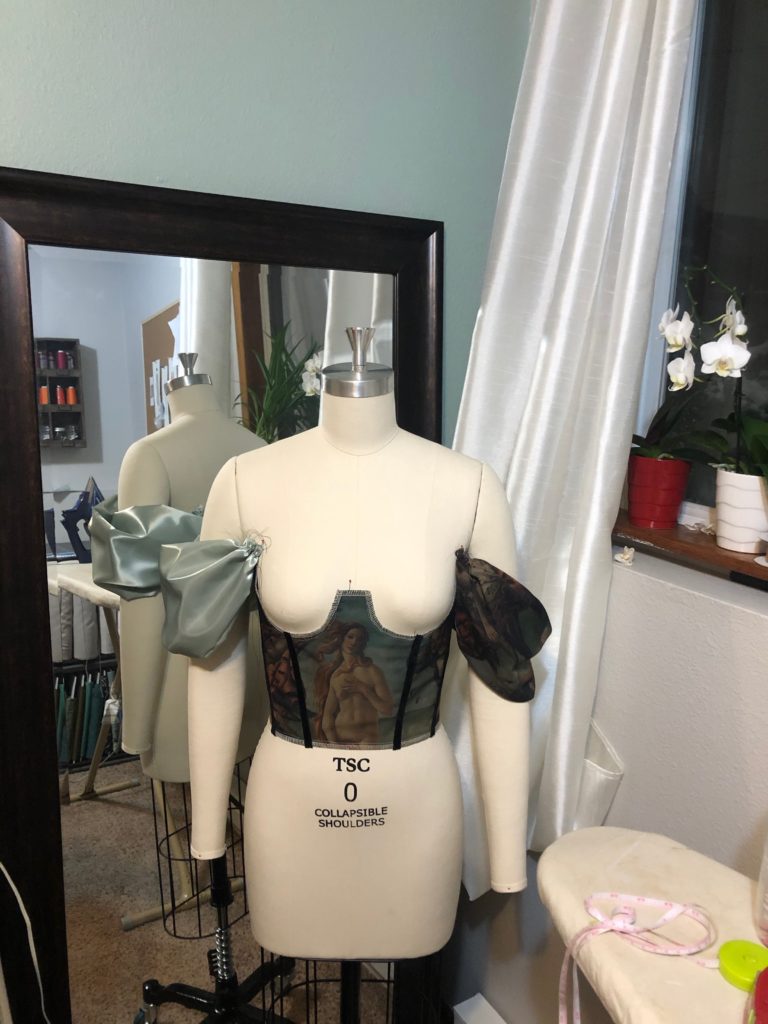
I was debating between a draped sleeve and a poof sleeve and after an instagram vote I went with the drape. It’s a good choice. I’ve never done a drape sleeve before so I looked online and couldn’t find quite what I wanted. So there was a lot of measuring and practice fabric trials. For the sleeve I went with a length of 19in and a width of 11.5in. I folded the fabric along the width (hotdog style) and serged the edges. Sewing it into a tube basically. After stitching I pulled it right side out and pressed it. This leaves the measurements with a length still of 19 and a width of around 5.5in. I used a basting stitch at both ends of the sleeve to gather.
After gathering the ends, I began pinning where I wanted my sleeve. For this step I really did appreciate having my dress form. However this draping is possible without one, it may just take a couple more fittings. Also after gathering the ends of your sleeve, you can steam iron the gathers to help it lay better. For the front of the draped sleeve I placed it just behind the seam allowance of the cup. The back of the sleeve is placed over the seamline of the back bodice.
Again these are the measurements and style that worked for me. But depending on how you want your fit it’s definitely something to practice. After I got my sleeves how I wanted, I stitched each to the main bodice. Once attached to the main bodice you can sew your liner piece. Careful not to catch the drape of the sleeve in your stitching.
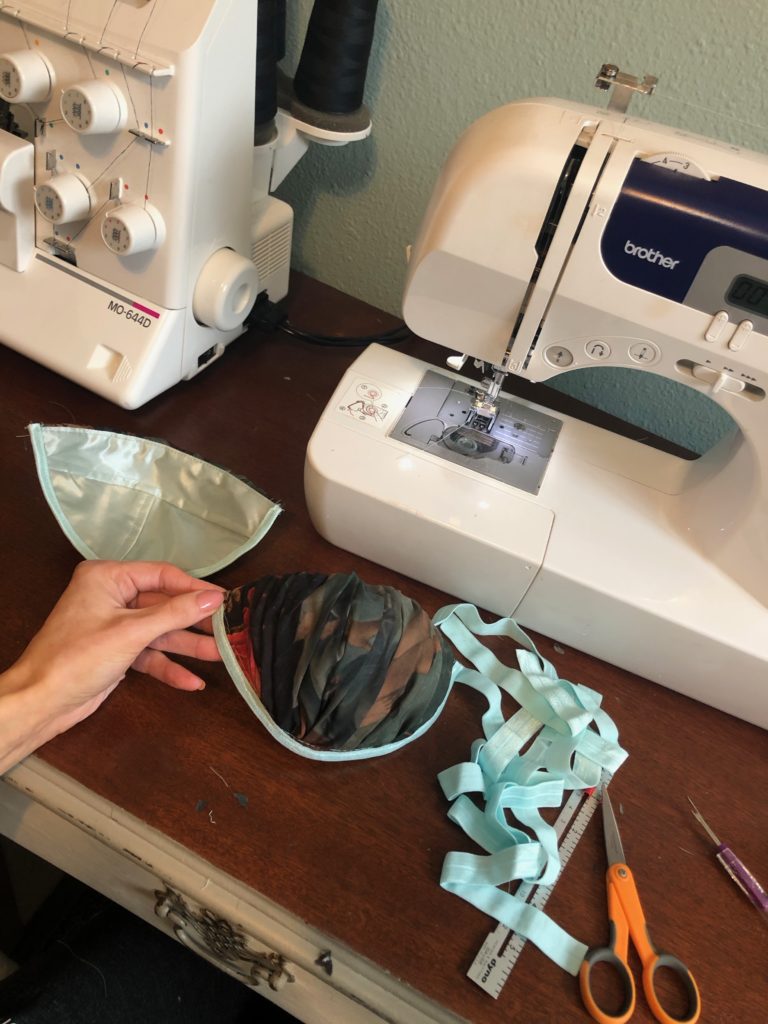
Making the cups
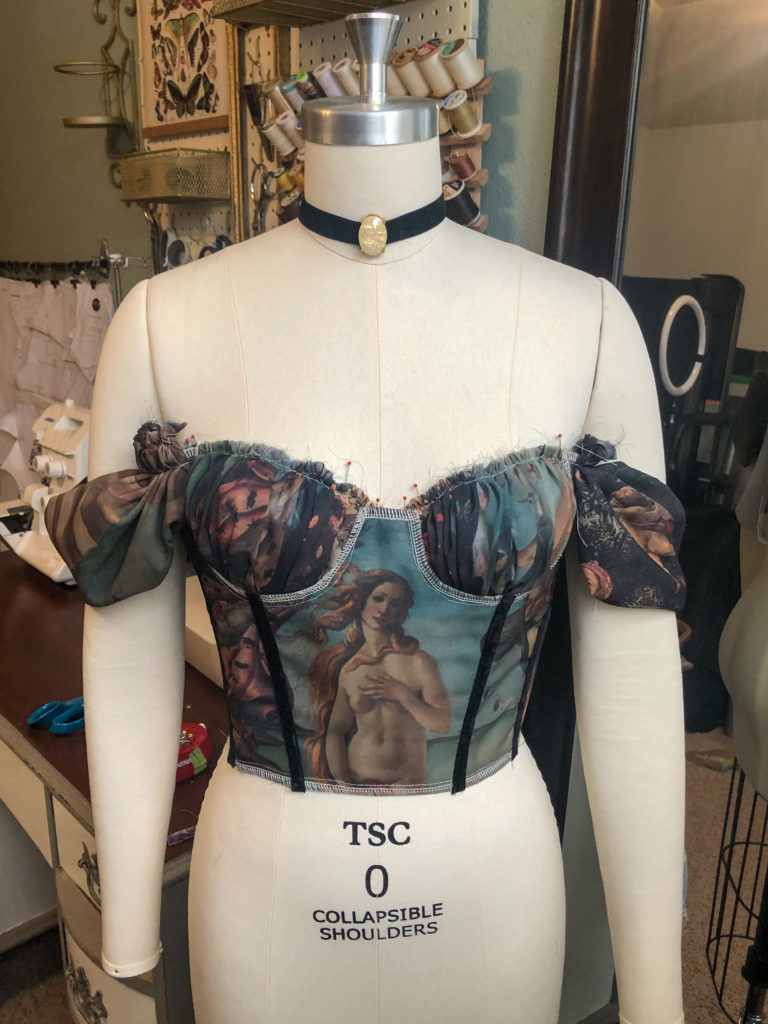
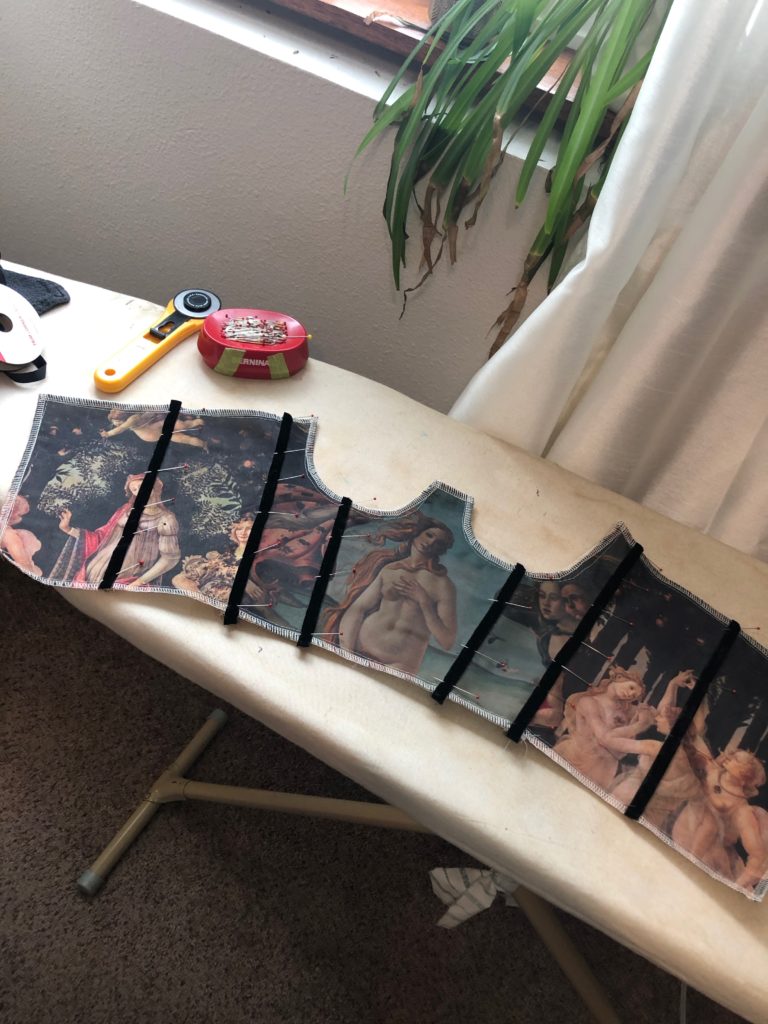
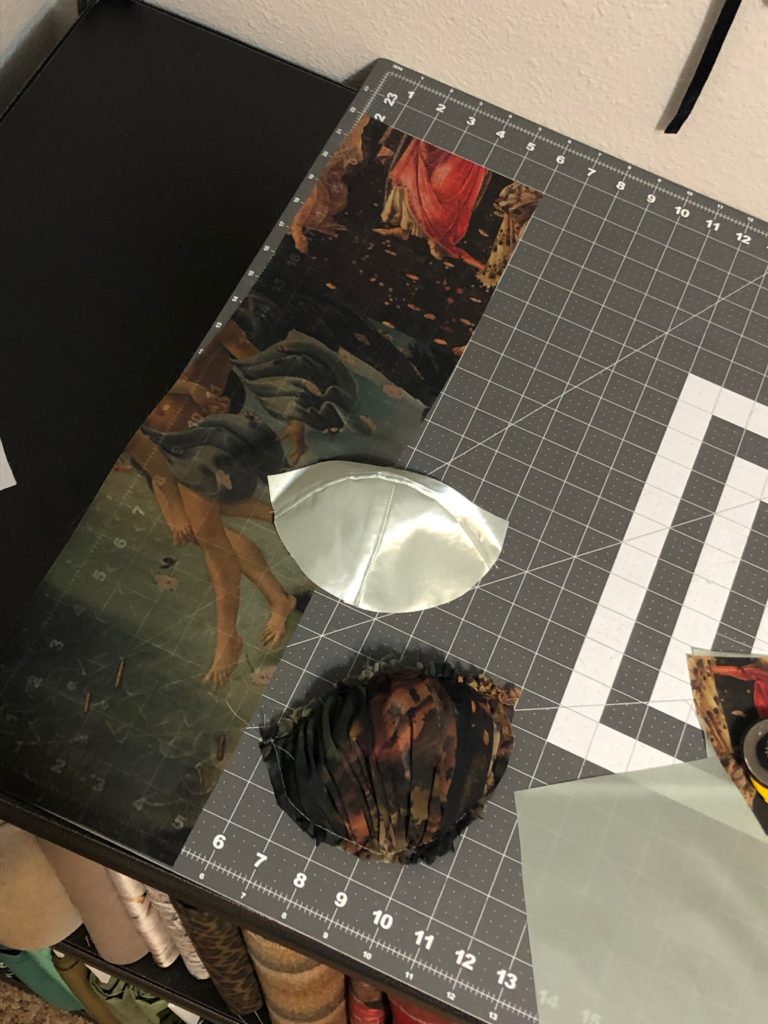
With the main part of the bodice completed we can begin with the cups. I have two pairs of cups cut in the lining fabric. One of these pairs will be used for the base of the gathered chiffon fabric. So my cup measured about 7in across the width so I decided to have 3x the gather. Then adding a little extra to the length. So the gathering piece of fabric measures 22in by 6in. However, you may want to increase the length if you’re using a larger cup size. Also, depending on the weight of your fabric you may want to decrease the width. The chiffon gathers easily compared to other fabrics.
Gathering cup fabric
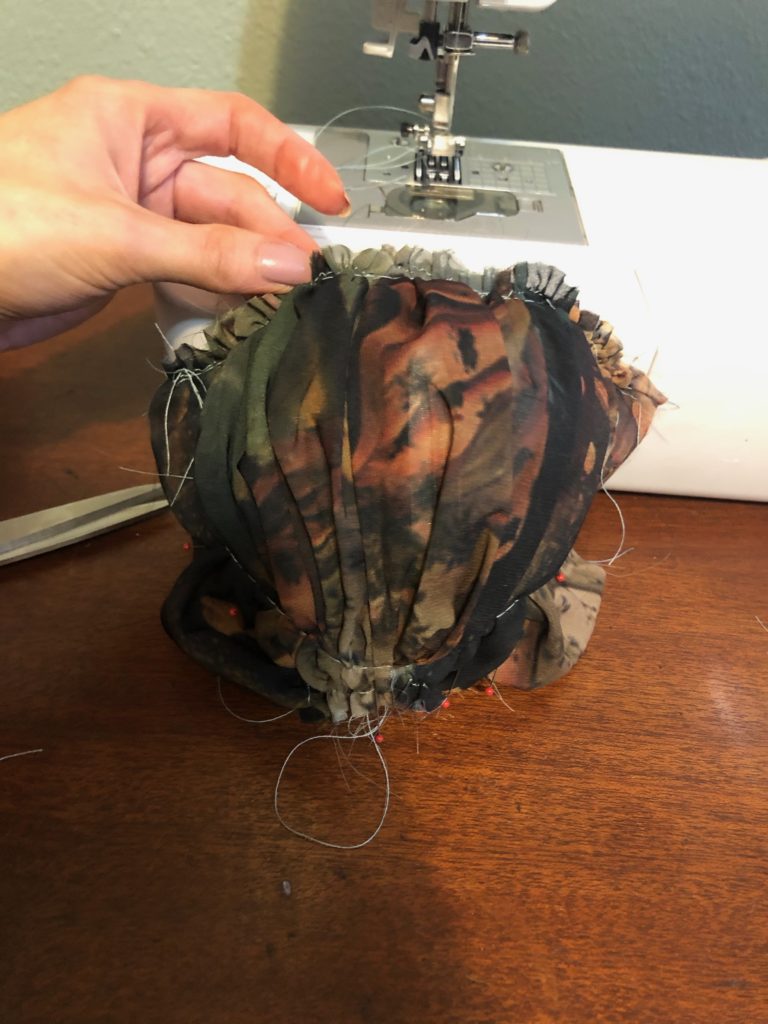
Once the sizing is set we can being to gather. Starting with a basting stitch, near the edge, sew along the top and bottom. Once the stitch is in, we can gather the strip of fabric. After its gathered to about the length of the cup I again used the steam from my iron to set the gathers and make them more manageable. I began pinning the gathered piece to the cup. I tried to keep my gathers looking vertical. It was a lot of playing around and trimming of excess fabric. After a lot of pinning, I used a basting stitch to secure the two pieces.
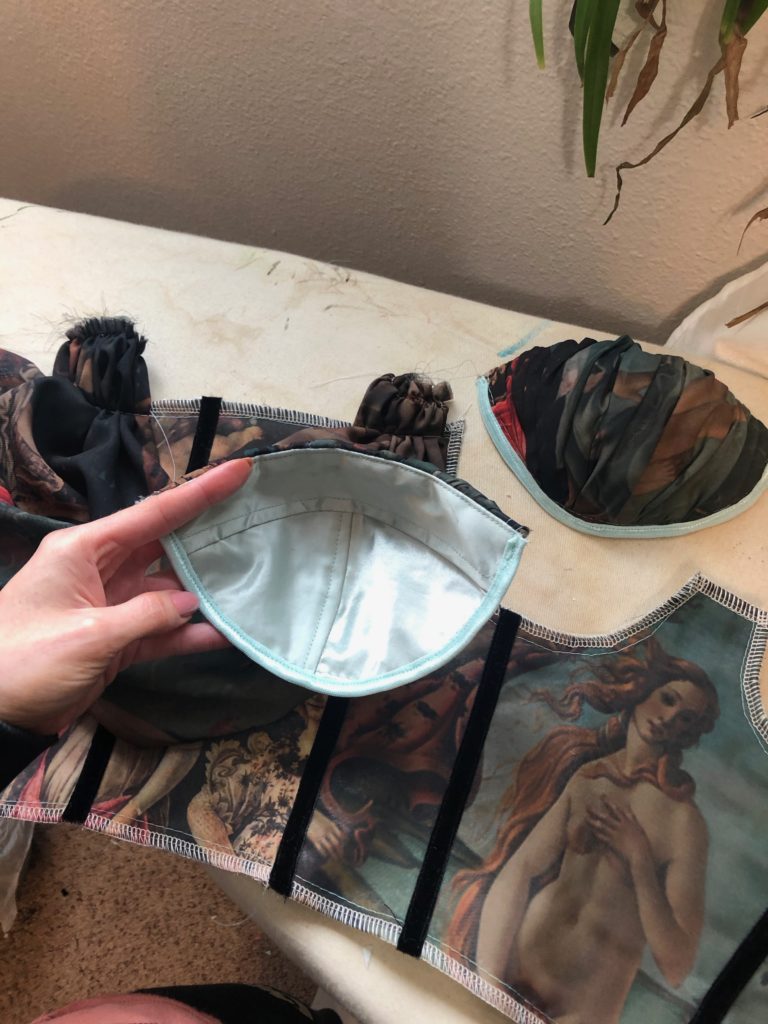
After the gathered fabric is basted to the main cup piece, we can finish the cups. Sewing the lining cup to the main, right sides together. Once trimmed and pressed I finished the bottom edge of the cup with fold over elastic. Now once the cups are finished they can be sewn into the bodice. It could be the gathered layers of fabric and interfacing but my machine STRUGGLED to sew the cups into the main. I eventually got through it with some hand sewing. Also, my machine is not a heavy duty one, so I could see others doing better than mine did.
Finishing the bodice
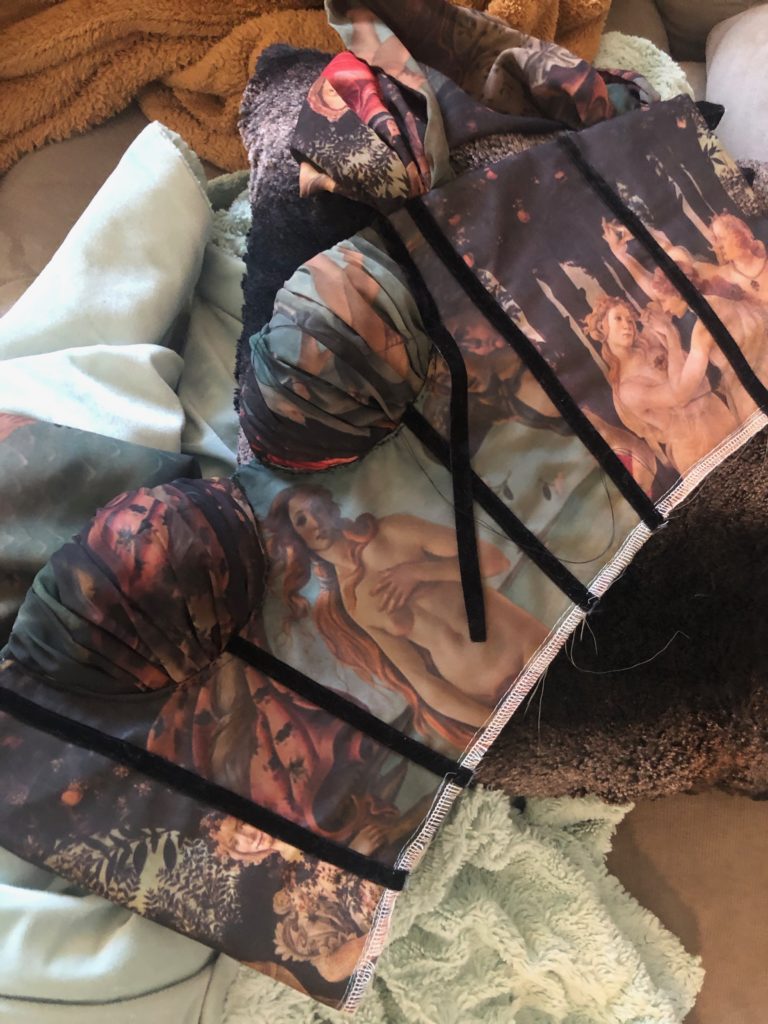
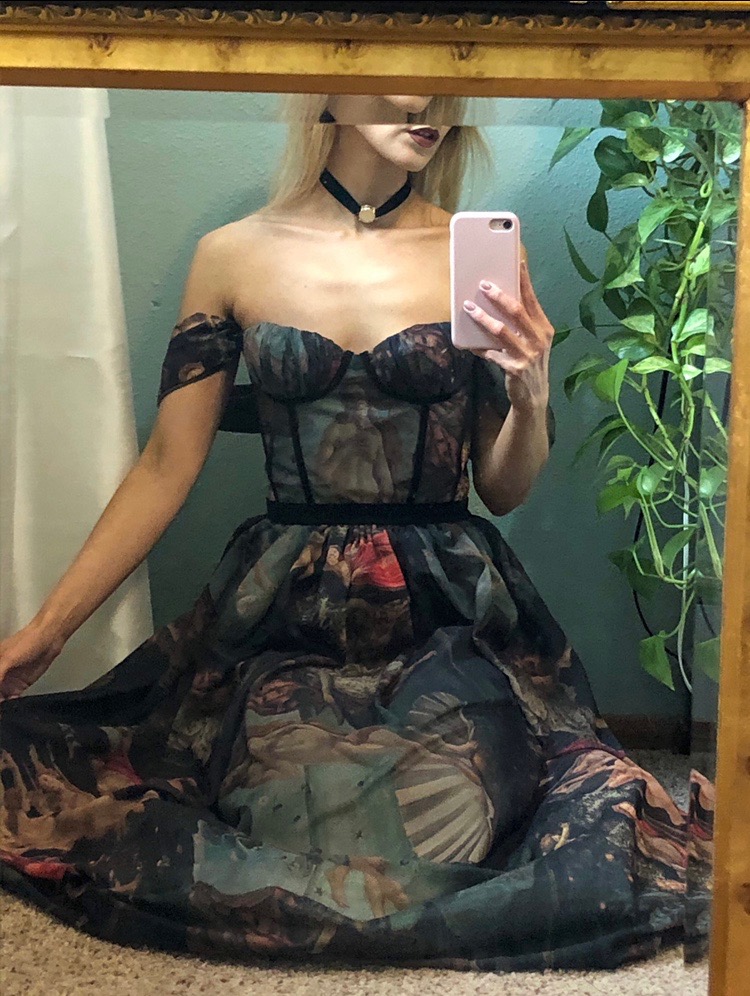
After the cups went in, I knew the bodice still needed a little something. The same black 3/8in velvet trim I used on the seam lines I applied along the cup seam. This velvet trim is not cut on the bias. Due to this, it doesn’t naturally want to curve. I carefully shaped it and hand stitched it. However, it has some slight wave to it. Just something to note.
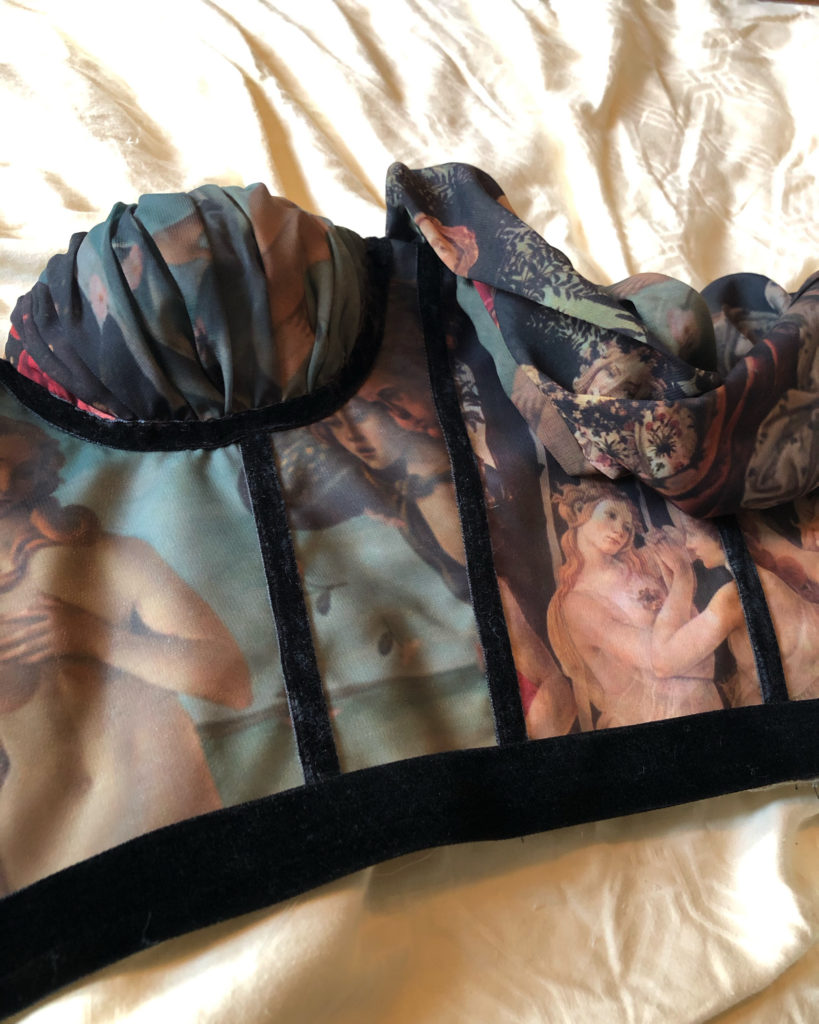
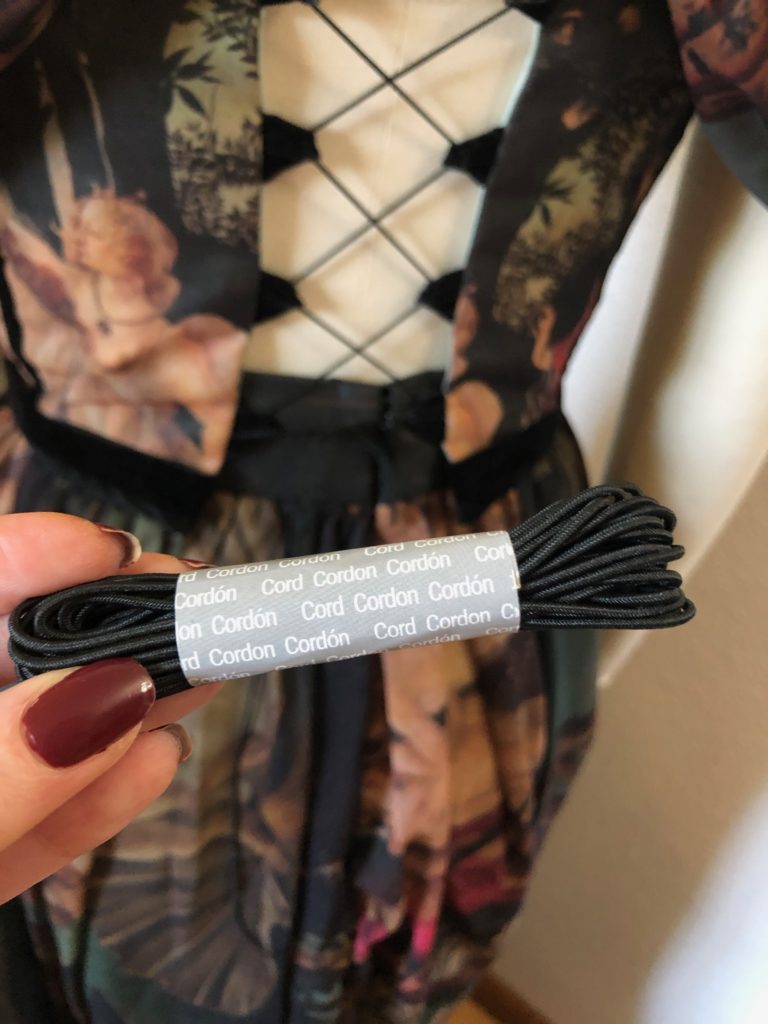
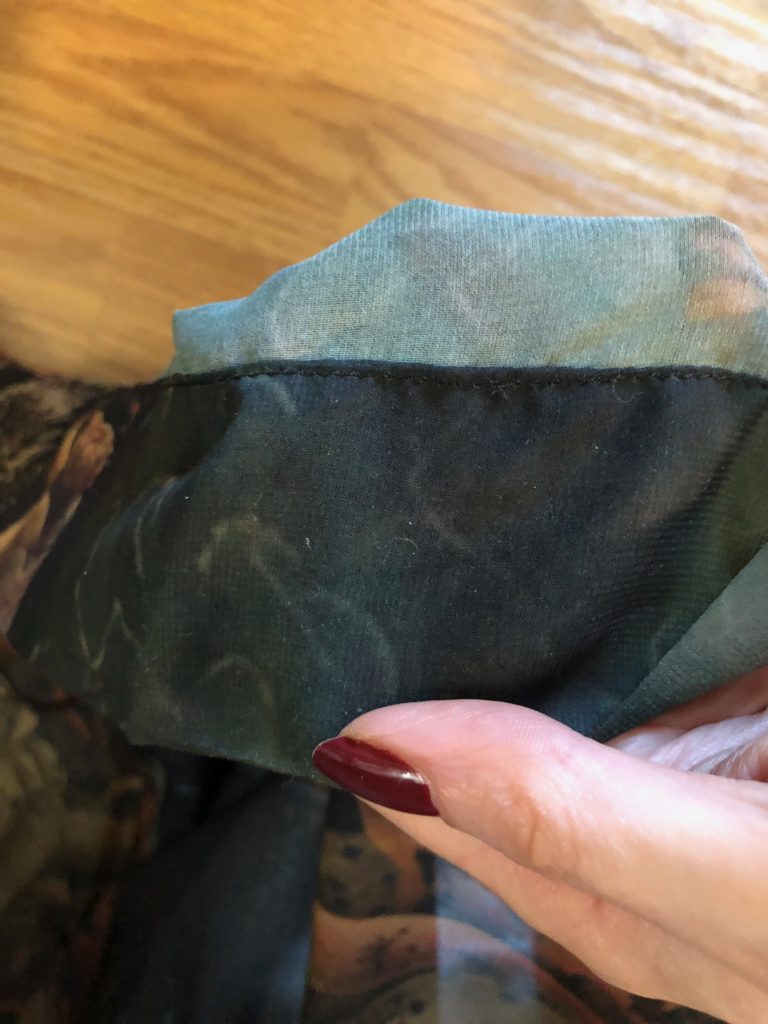
Finishing off the bottom hem of the bodice I first sewed extra wide black bias tape so there are no raw edges. After the bias tape was sewn onto the bottom hem I hand sewed on 1in black velvet trim for a couture look. To lace up the back closure of the bodice I used black elastic cording. Not to be confused with elastic thread. I like the elastic cording for corset style tops because its durable and stretches.
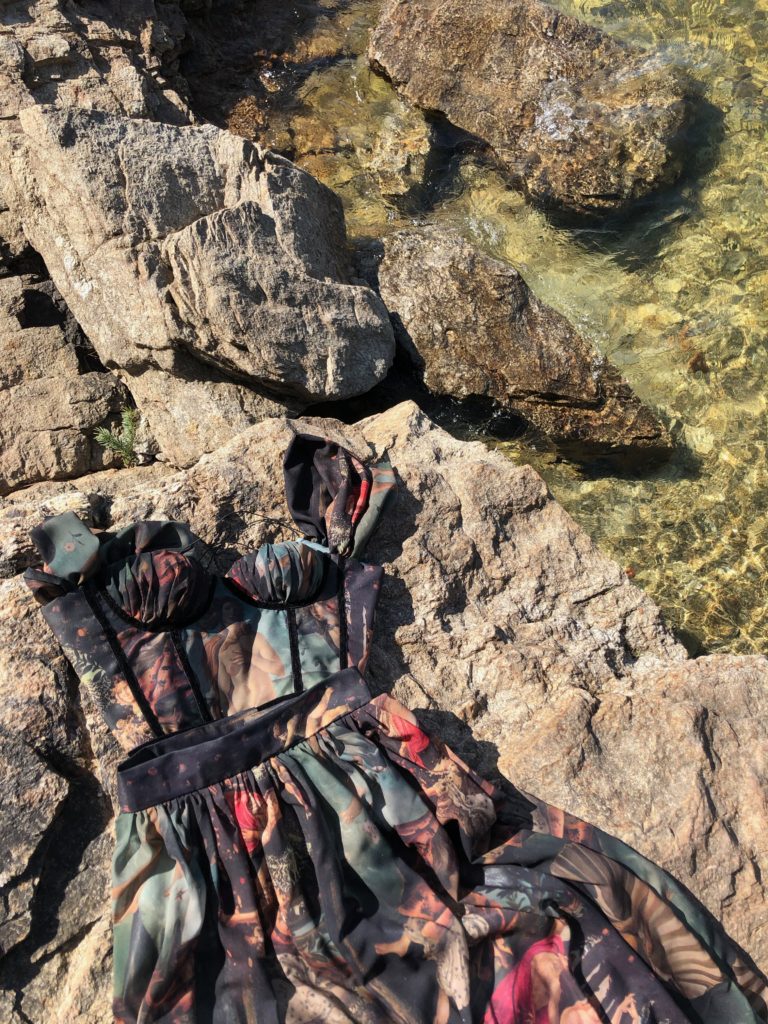
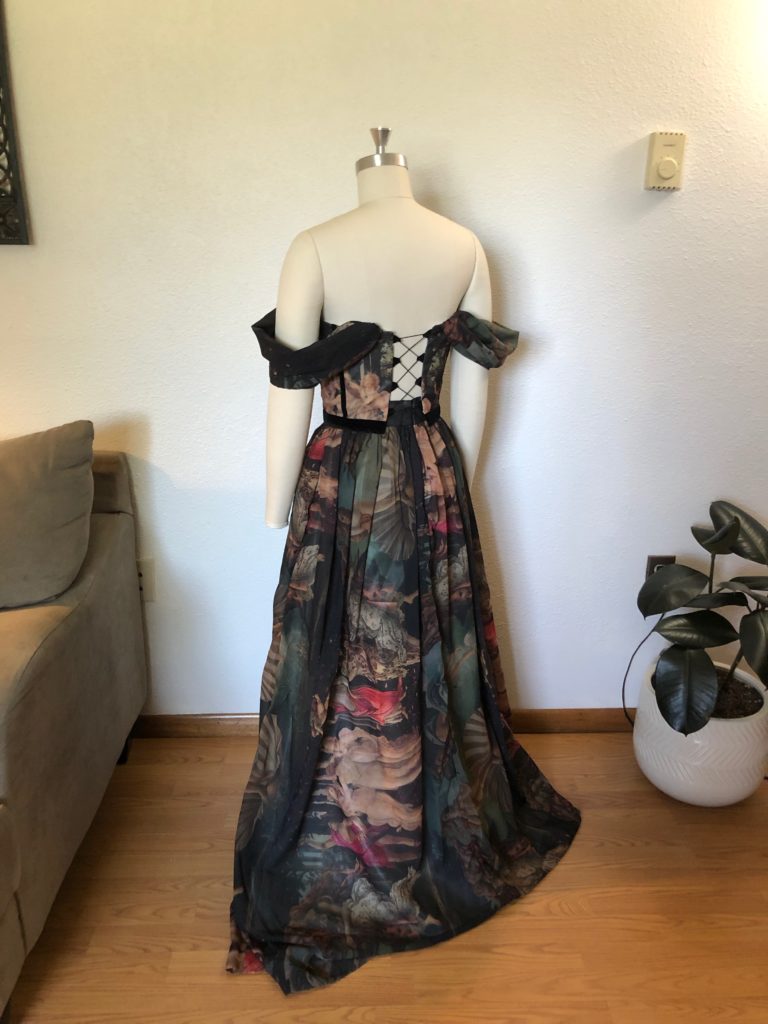
The skirt
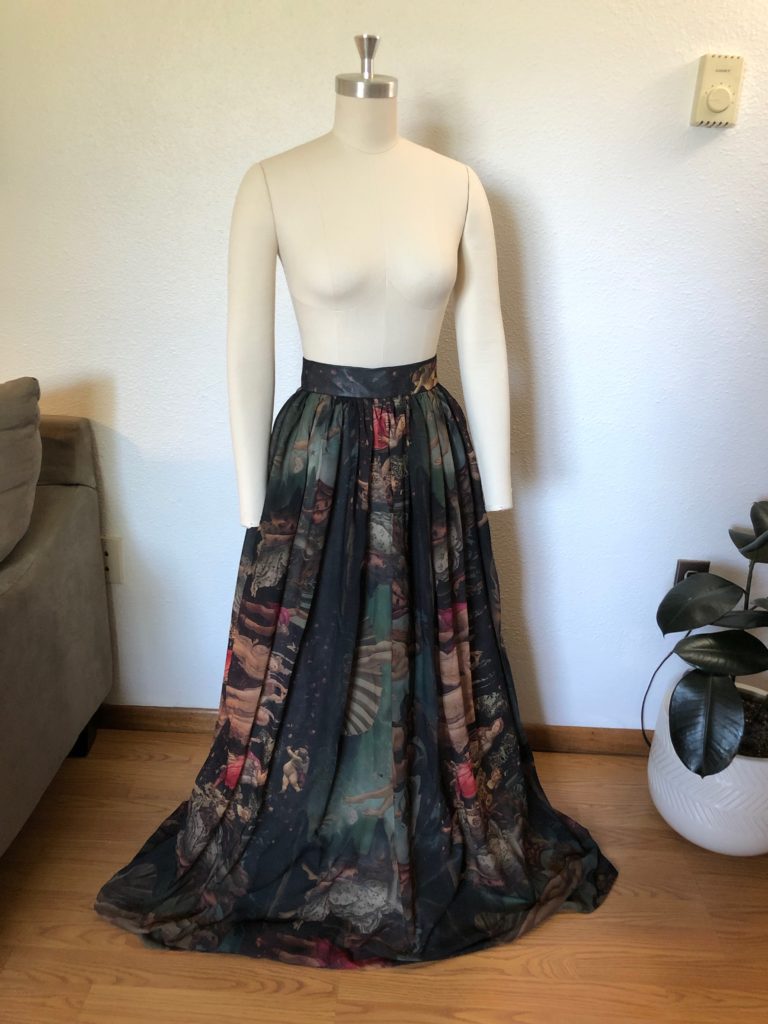
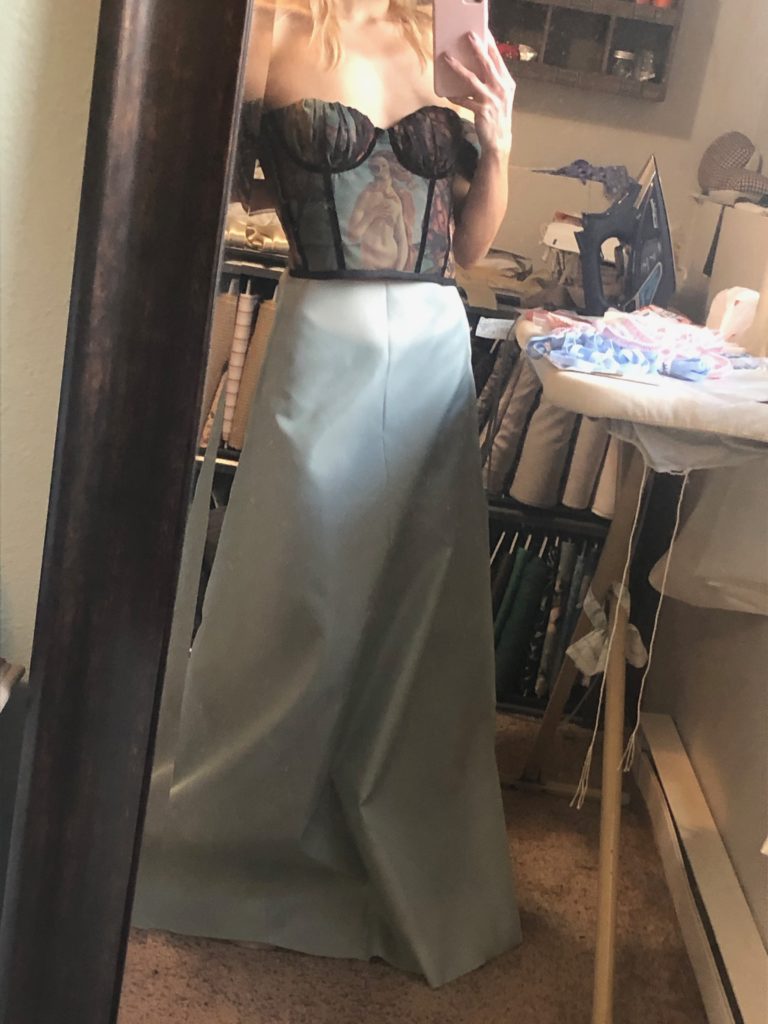
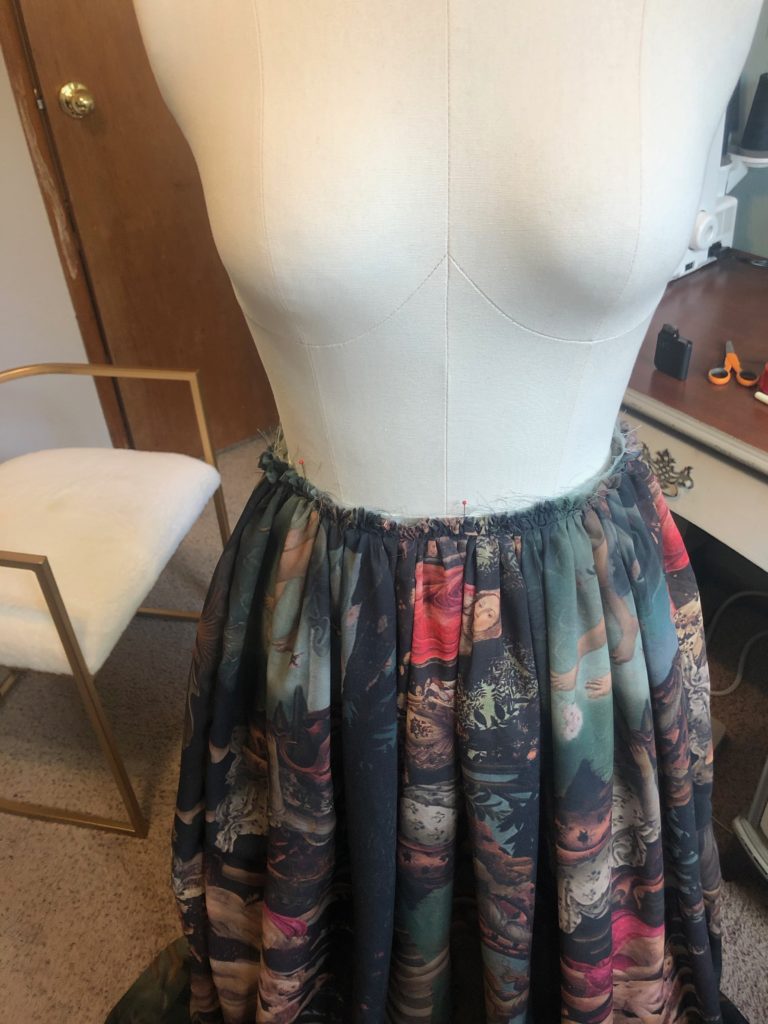
At this point I just want to be finished. I stretched this project out over a couple months, so mentally I am over it. For the base of the skirt I used a full length A-line style. I have some pictures of the fit but it was just quick self draft. After I got the shape of my lining fabric cut, I started on the main fabric. To create my gathered skirt I used two rectangles of the main fabric. One for the front, one for the back. My fabric width was 56in and I used an approximate length of 45in. These measurements are what worked for me. However if you’re taller and or want more gather you may need to adjust. I wanted a dramatically long skirt so my measurements reflect that too.

Since I decided on a back zipper I split one large rectangle piece in two. So I have one large rectangle for the front. And two rectangles for the back. Although you could easily put in a side zipper and skip cutting one of your pieces, if you prefer. Once my rectangles are prepared I sewed the side seams. Also, using my serger for any exposed seams. Then finally sewing the back seam but leaving 9-12in open for the zip.
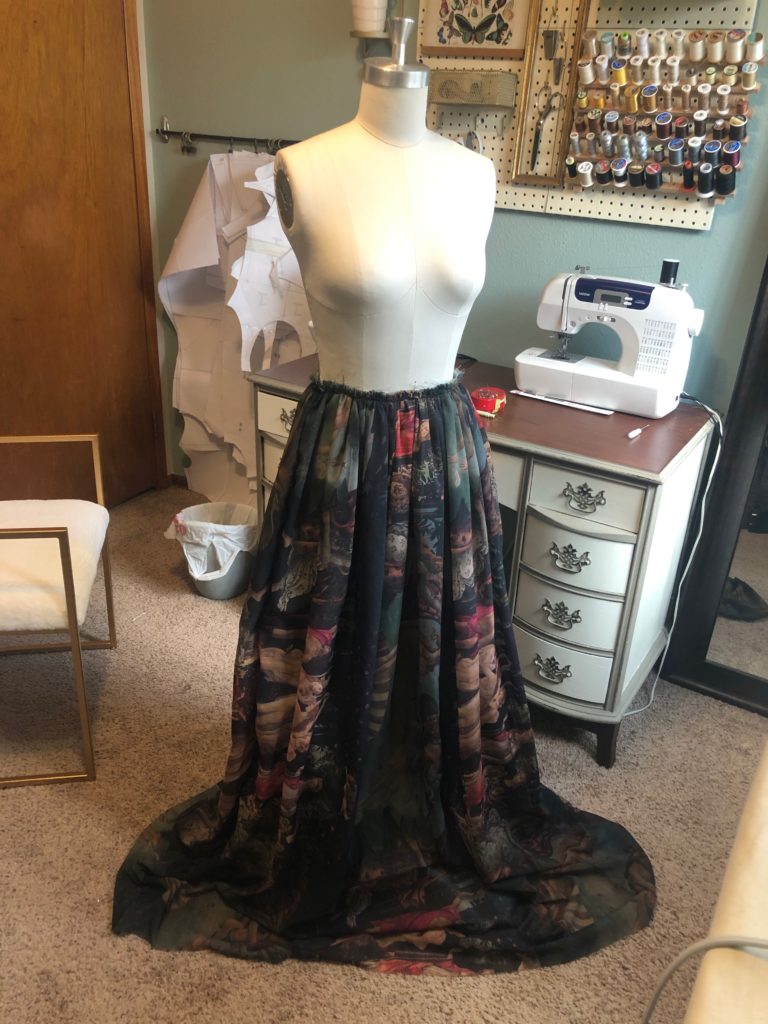
Now it’s time to gather the skirt. To start, I do a basting stitch along the upper edge of the main fabric. Once in, I start gathering by hand. Moving the fabric together till its the length of the waist of my lining fabric. Like with the bodice I steamed the gathers of the skirt. After the main fabric is manageable I baste stitch the main to the lining fabric.
Waistband of Skirt
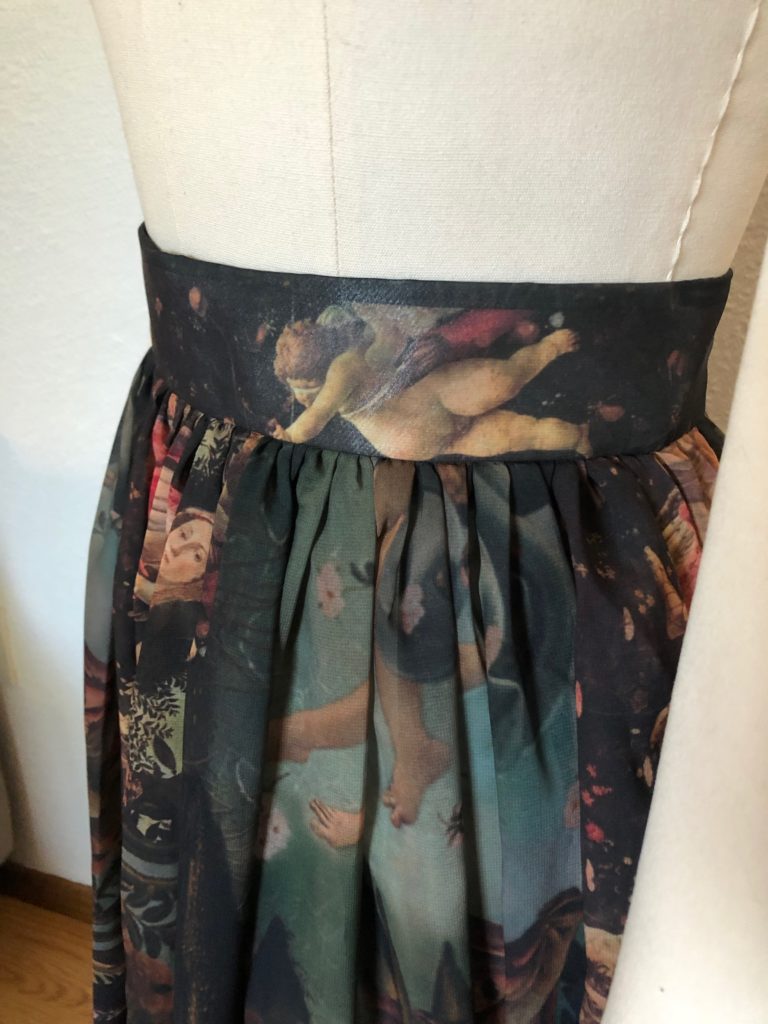
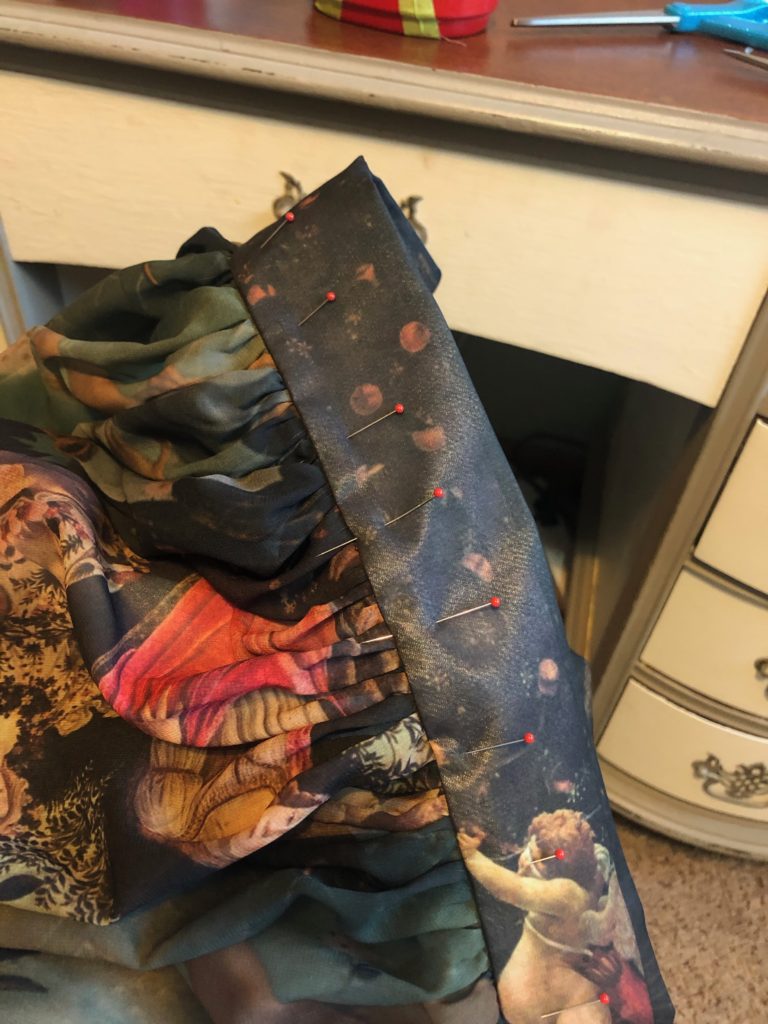
To create the waistband my fabric rectangle was approximately 26.25in for the width and 5.25in for the length. For a finished measurement of a 25in waist and a 2in thick waistband. As with the bodice I basted the main chiffon fabric to a piece of interfaced lining fabric. Sewing the waistband right sides together with the skirt. I then trimmed the seam and pressed it up towards the waistband.

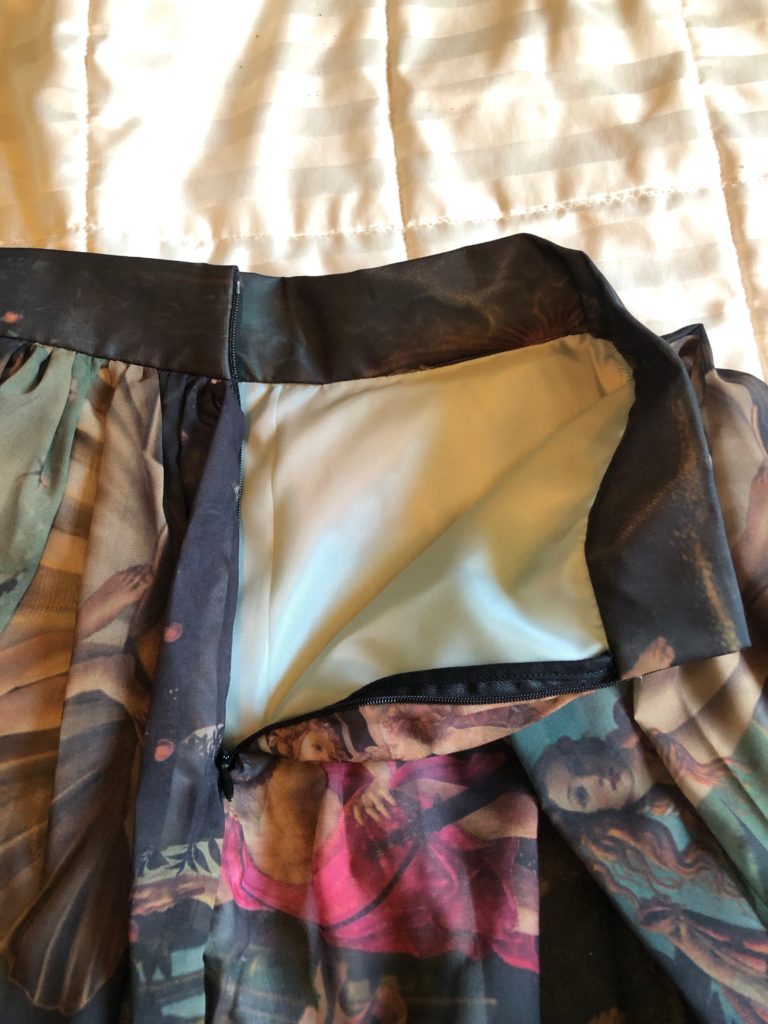
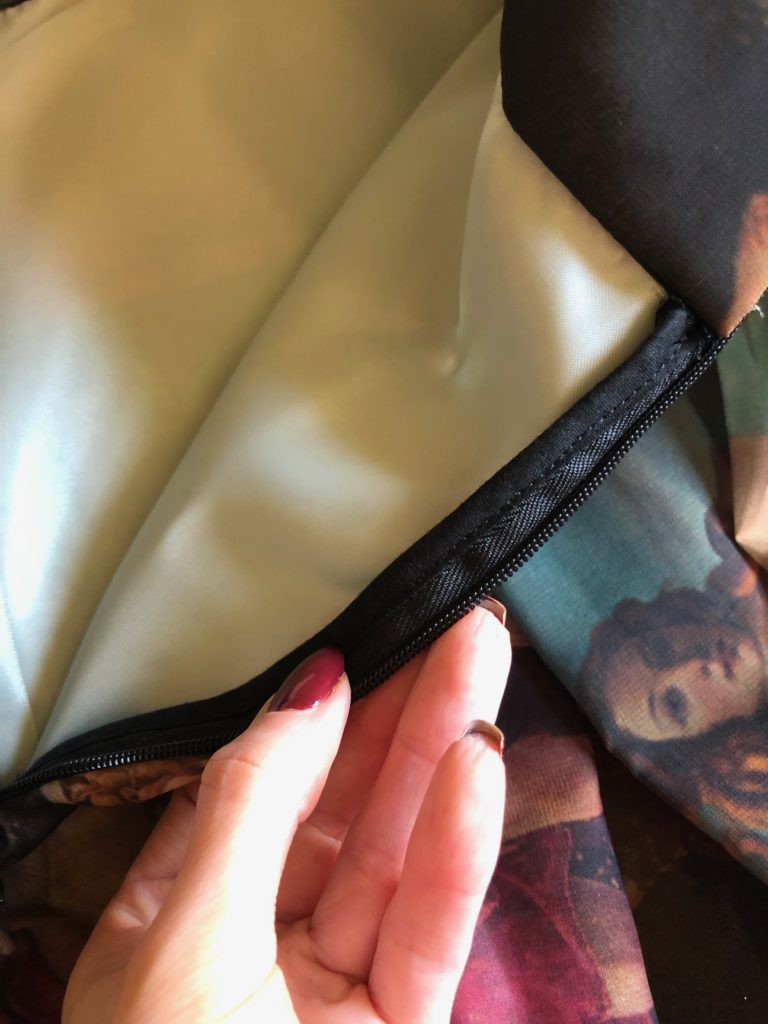
Before finishing the waistband, I installed my invisible zip into the main and lining fabric. Finally, folding the waistband over to the lining side and stitching in the ditch on the main to finish off. On the zipper edge I added bias tape for a clean finish. And then finishing off the skirt with a wide 1 3/4in hem.
Fin
This project, to me, is a work of art. Although as an artist you are never fully satisfied with your work, this one is finished for me. I set out to create a Renaissance inspired fantasy dress and it fulfilled all my desires. If you made it this far, thank you so much for reading along. And thank you to everyone who supports my work. I am sure I would be creating regardless if I was sharing it with anyone or not. But it is so lovely to have wonderful friends to share my love of fashion with.