
OOhhhh hiii yeah I still blog sometimes. If you know me, and in true sagittarius nature, I’m an easy going person but I don’t do something if I don’t want to. And it’s not that I haven’t thought about blogging, my passion has just been a little distracted. Which doesn’t mean I have stopped sewing you can always keep up on instagram @jessjustmade I find it easier to post there quickly but I will try to quit ignoring my baby blog.
Tips
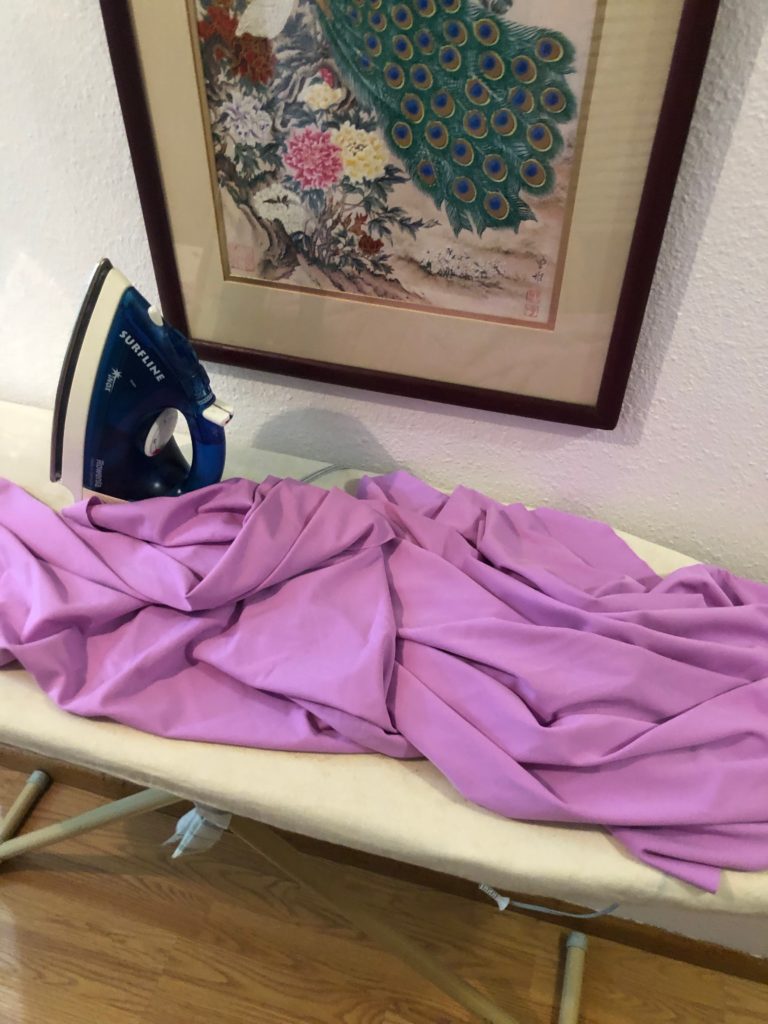
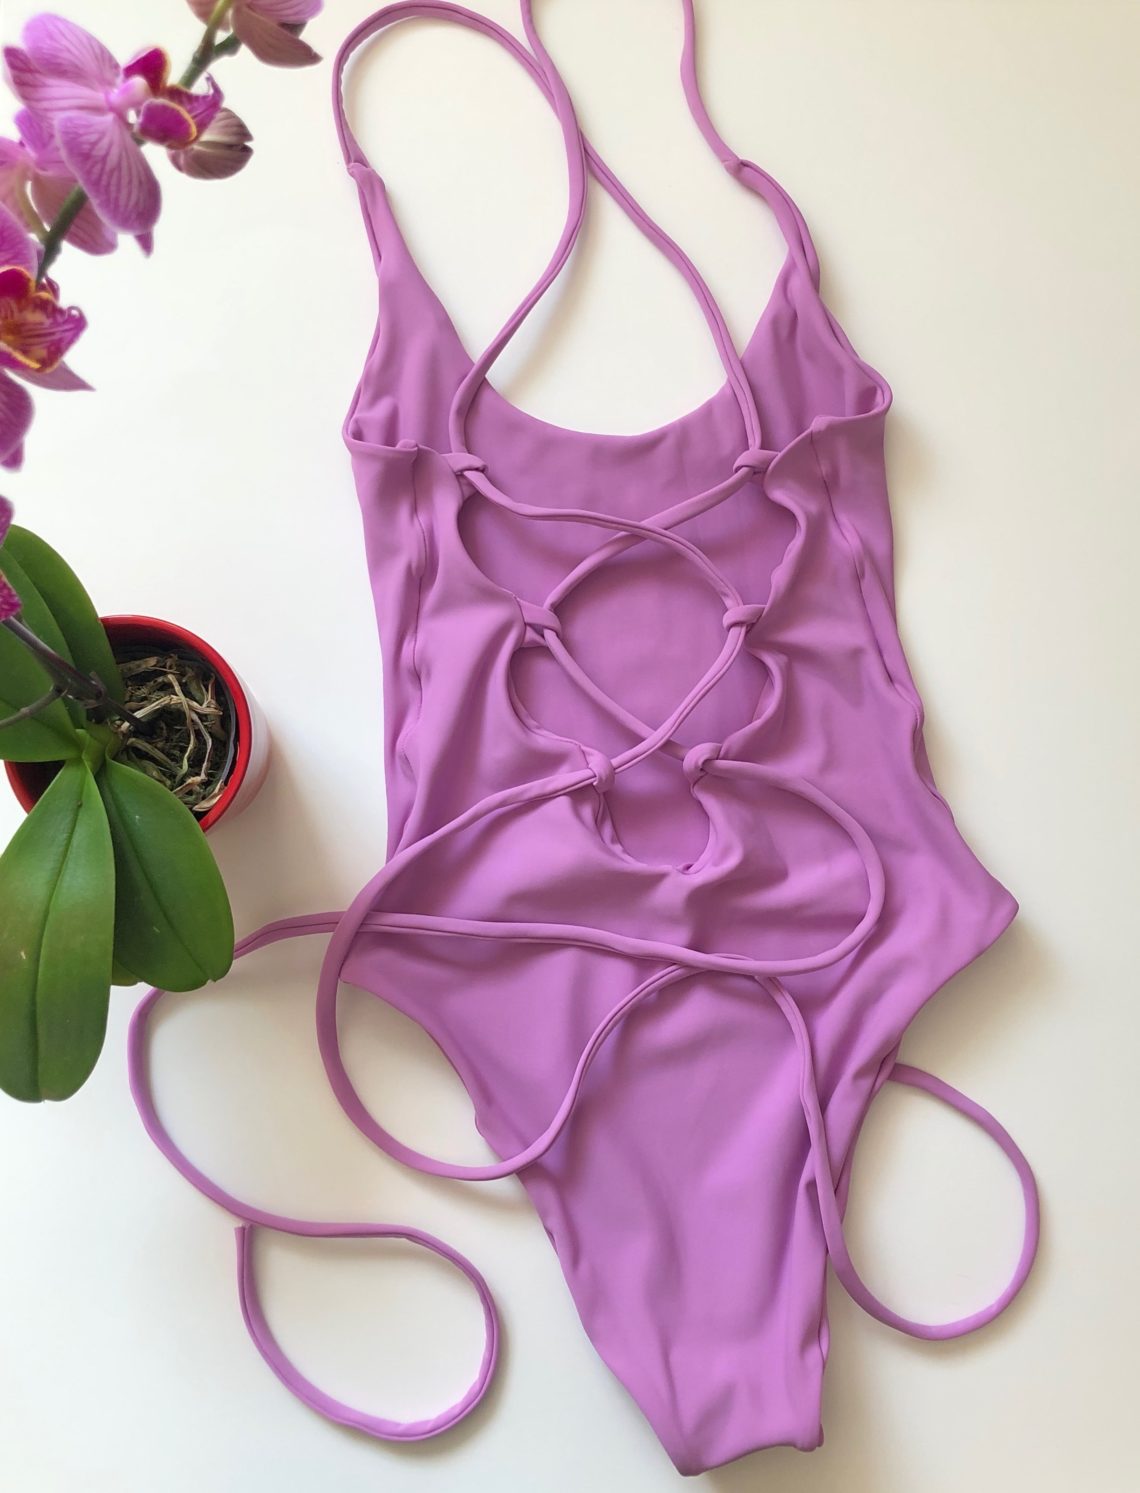
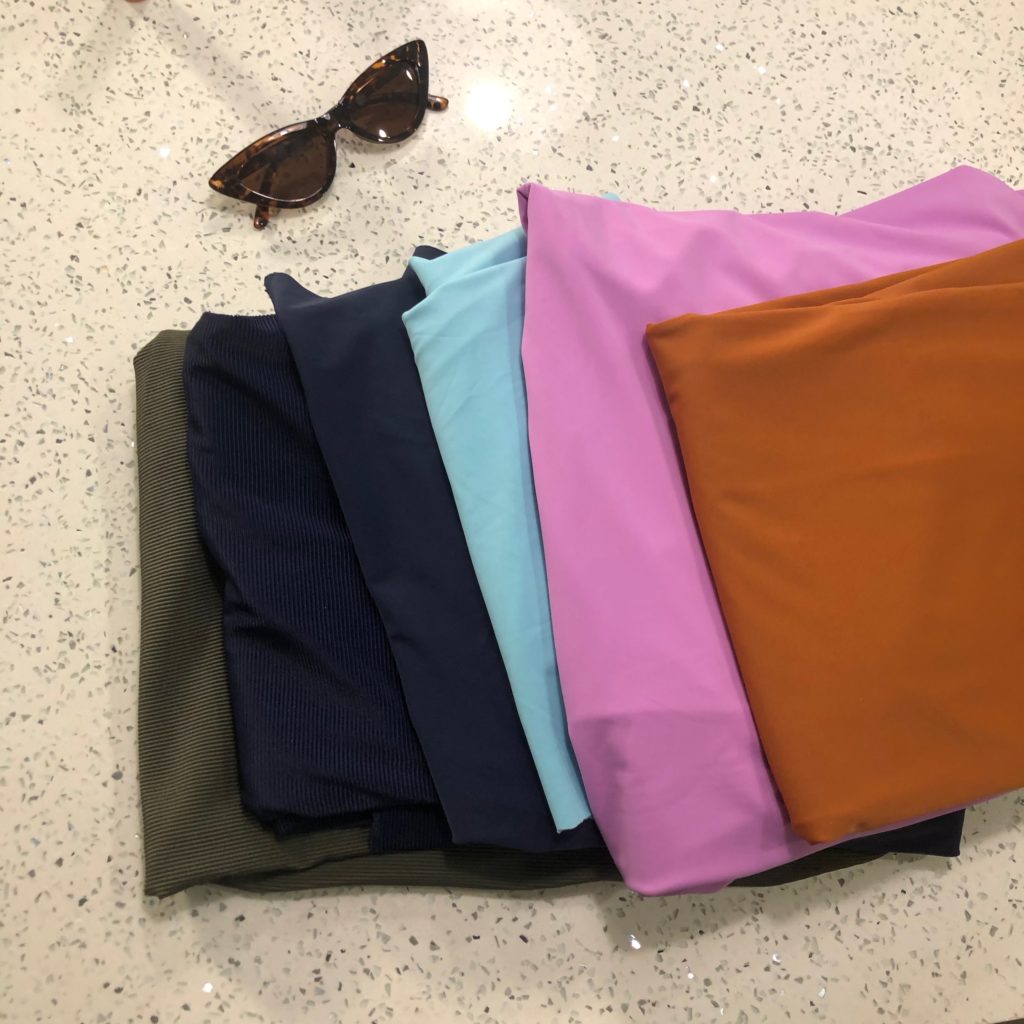
OK on to the good good. So I’m going to give you a couple low down tips on how I sew swimwear and then I will focus on the construction of the purple one piece. Ok so most of the swimwear fabric I’ve worked with can be ironed, but this purple fabric, the one I chose to blog about, is one that does not like ironing. So good reminder. Most swimwear is good with ironing but always, like with all fabrics, test out on a small section. Important parts to remember when ironing swimwear fabric is you will want a cloth between. I’m super classy so I use a dish cloth, also you will want to dampen your cloth and or mist it so its wet. Then you can play with your iron setting trying lower or putting it on the steam setting. But you’ll want the water/heat combo aka steam to play well with the spandex/lycra fabric. The purple swimwear fabric under any setting of my iron began to warp and wave. Be sure to be using a ballpoint needle, my machine likes 75/90, and a zig zag stitch.
Patterns
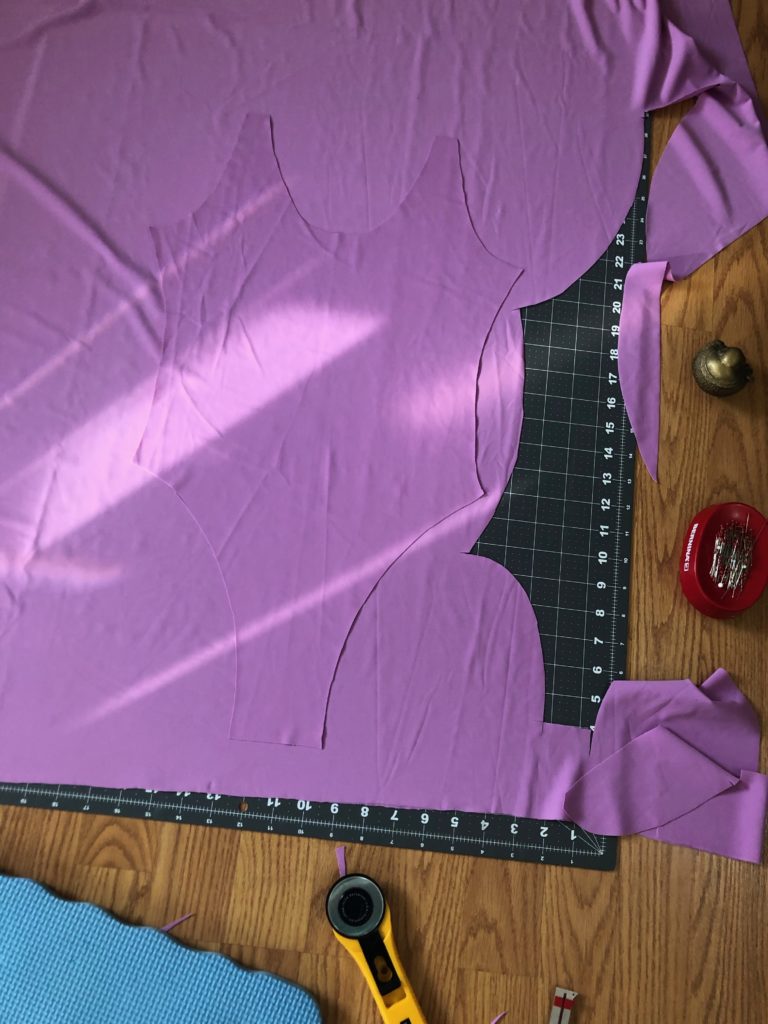
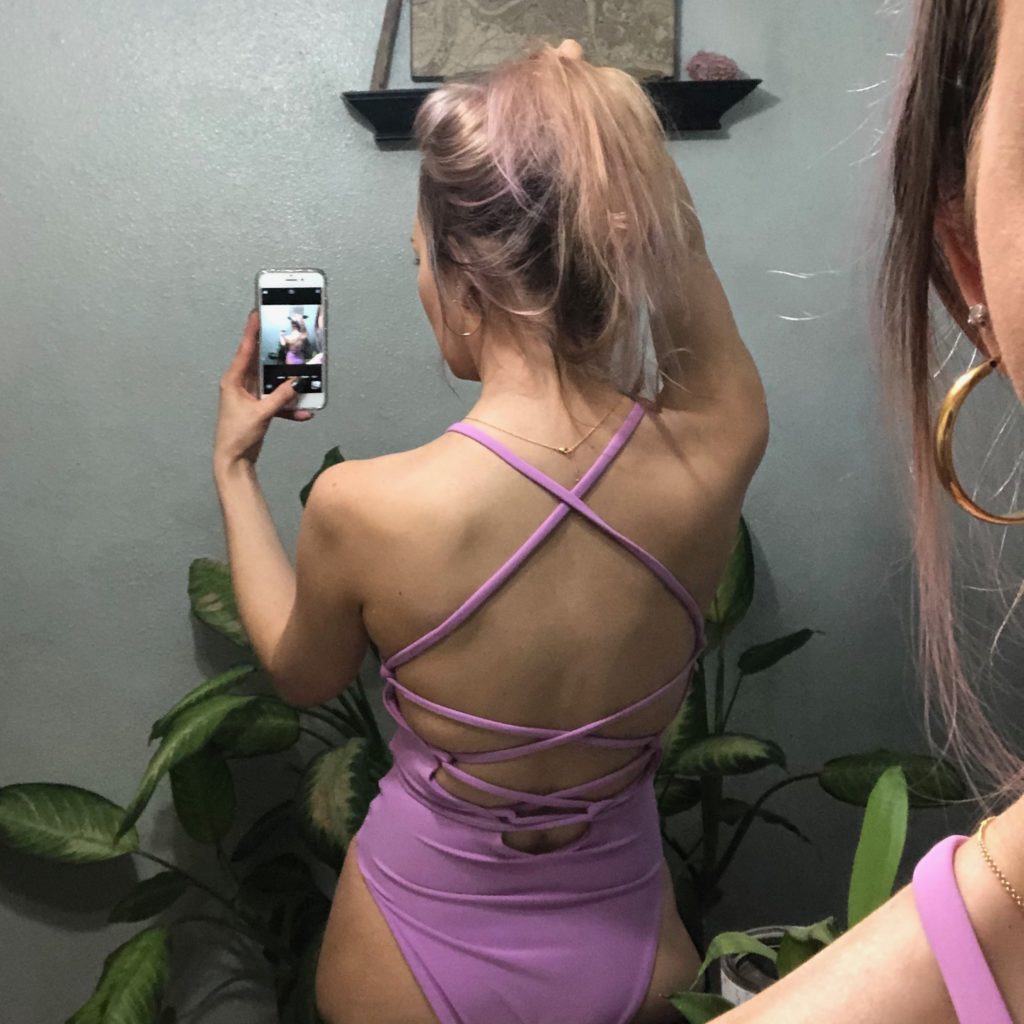
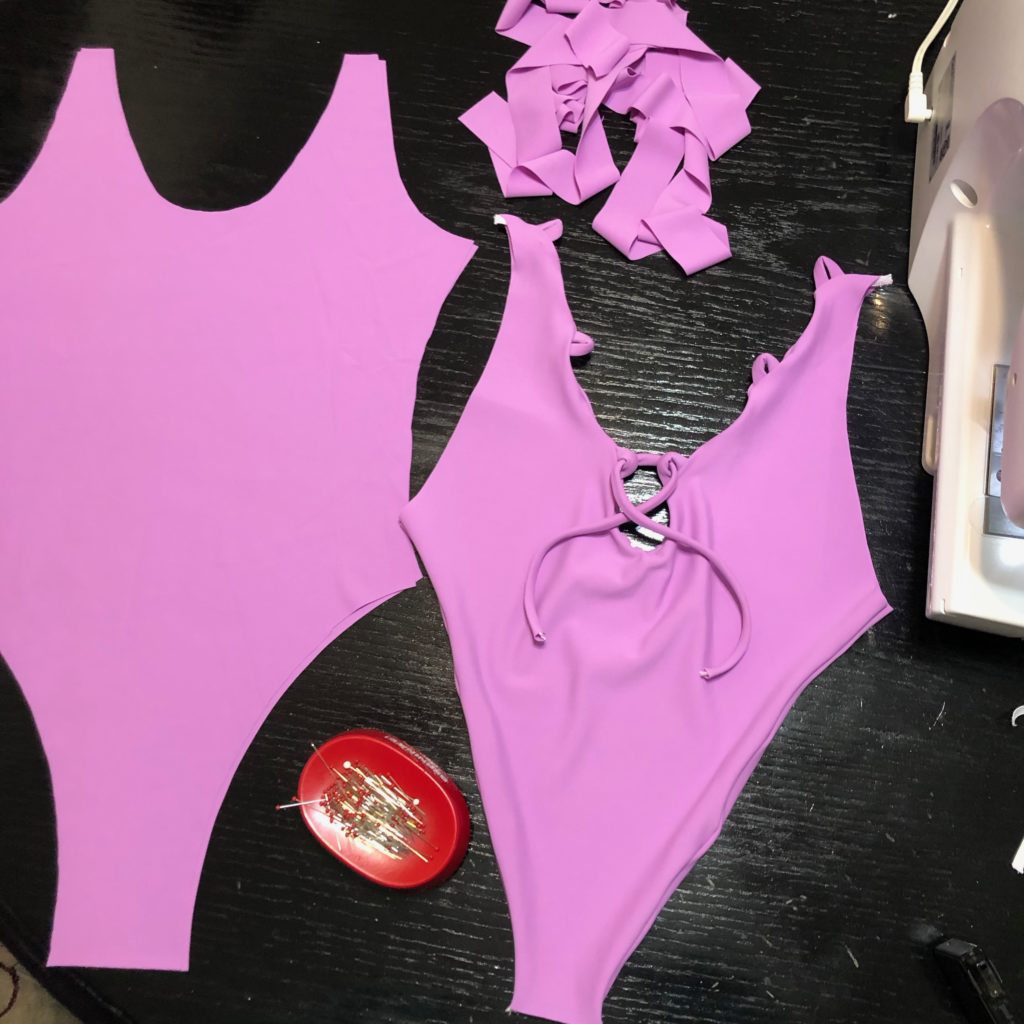
All swimwear patterns mentioned are from my favorite Edgewater Ave. If you want sewing swimwear videos you can check out the brand owner @katiefredrickson on YouTube. So the base piece for this design was the poppy one piece. I will say I have a long midsection so I’ve extended this pattern 1.5in. I’ve used a medium in the poppy. Ive modified this pattern by raising the front hip and made the back booty more cheeky like the Whitney bottoms, I also wear a medium in that pattern. My next mod came using the birdie one piece along the front, so what I’m saying is the neckline and the top of the straps, where straps will be inserted, where cut similar to that pattern. Again I played around with this and its been some time, which reminds me I really need to keep a sewing journal. So basically I apologize for any shoddy directions but if you have further questions comment below or feel free to message me on instagram.
OK for the back construction, this is one spot I regret not taking more pictures. I started with the poppy backside cutting from the bottom up. Since we don’t need the back shoulder straps, once I got the shoulder seam allowance I cut out straight across so I could fold the back piece in half to cut the curve of the back out symmetrically. To get the curve of the back I just used some chalk, on the wrong side of the fabric, to mark the shape and how deep I wanted my cut. Once I’ve cut out my first back piece I use that template to cut out the second back piece, right sides together.
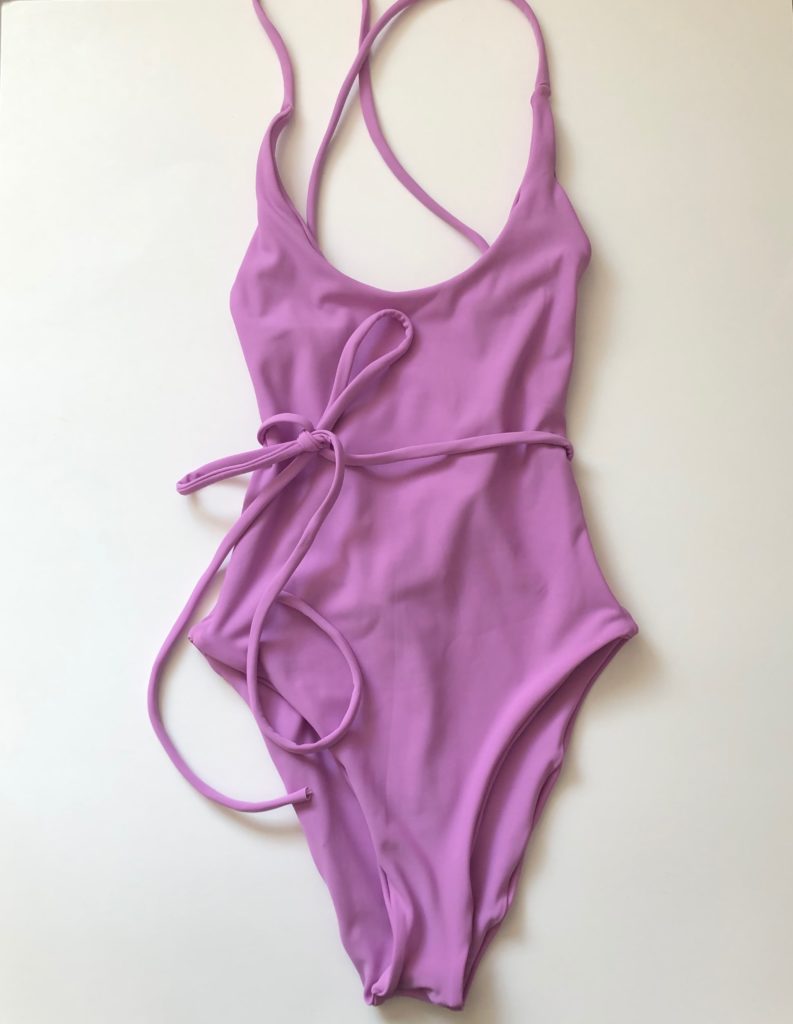
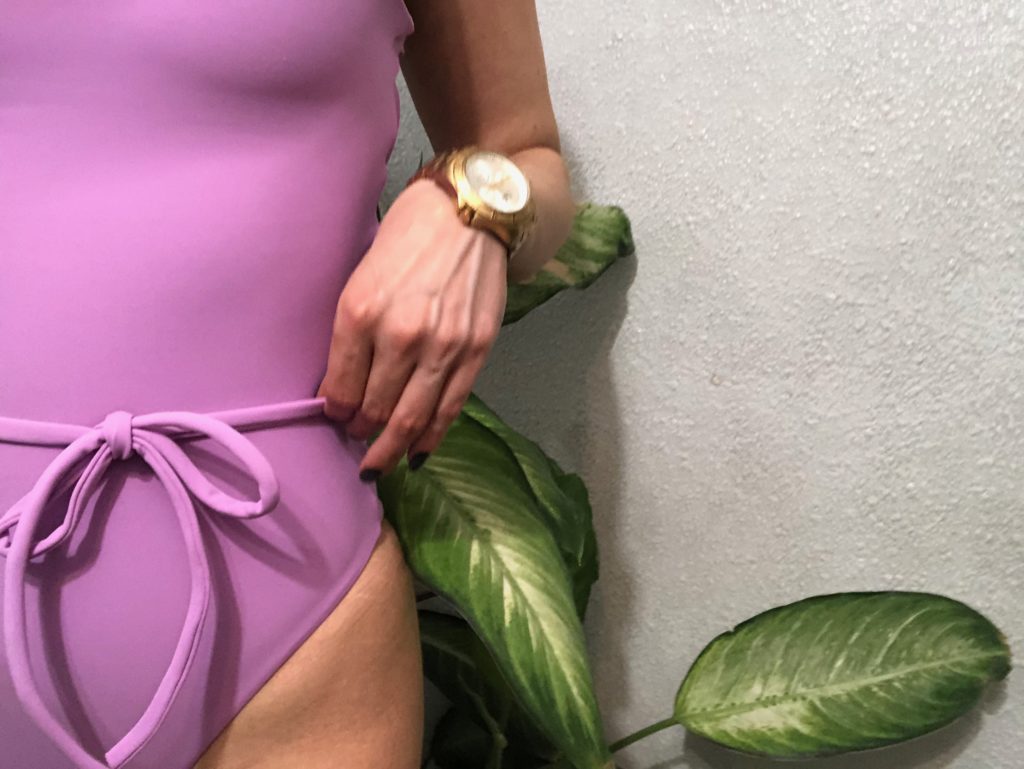
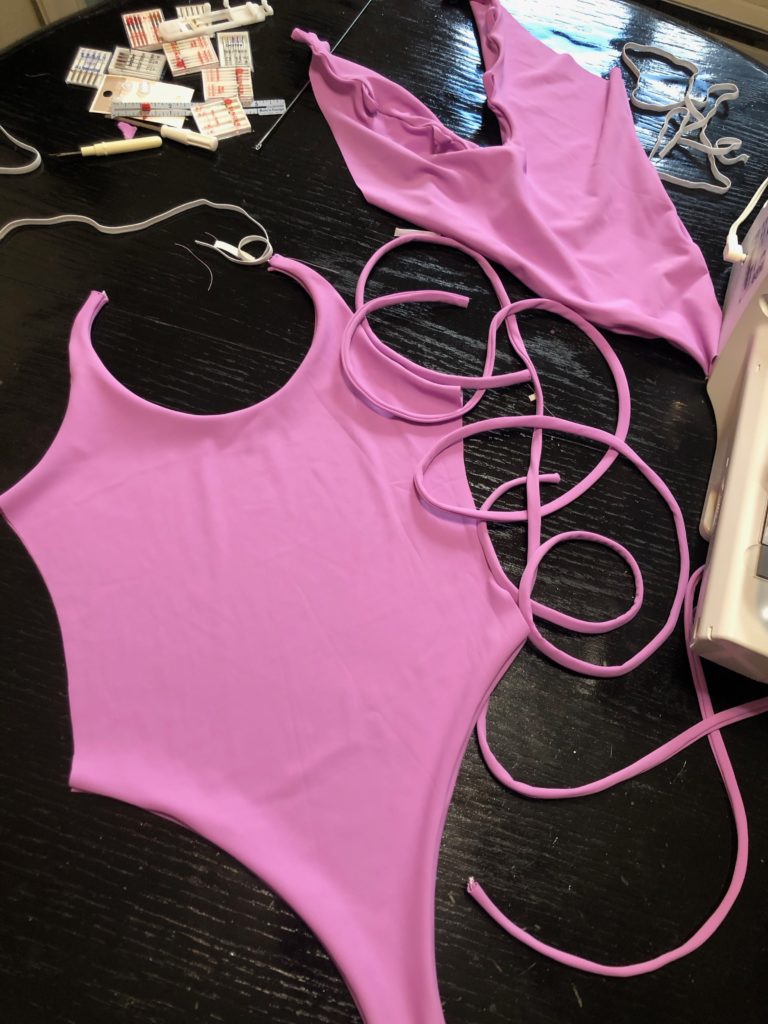
So for sewing this suit the pieces needed are two fronts, two backs, two long strips for the should straps measuring 1 1/4in wide and I think I cut mine 70in long but that may vary based on your sizing, finally an extra strip of fabric for the loops on the back 1 1/4 wide by whatever length I think I did 20in which was an overestimate. But you can always cut off you can’t always add back on.
Sewing time
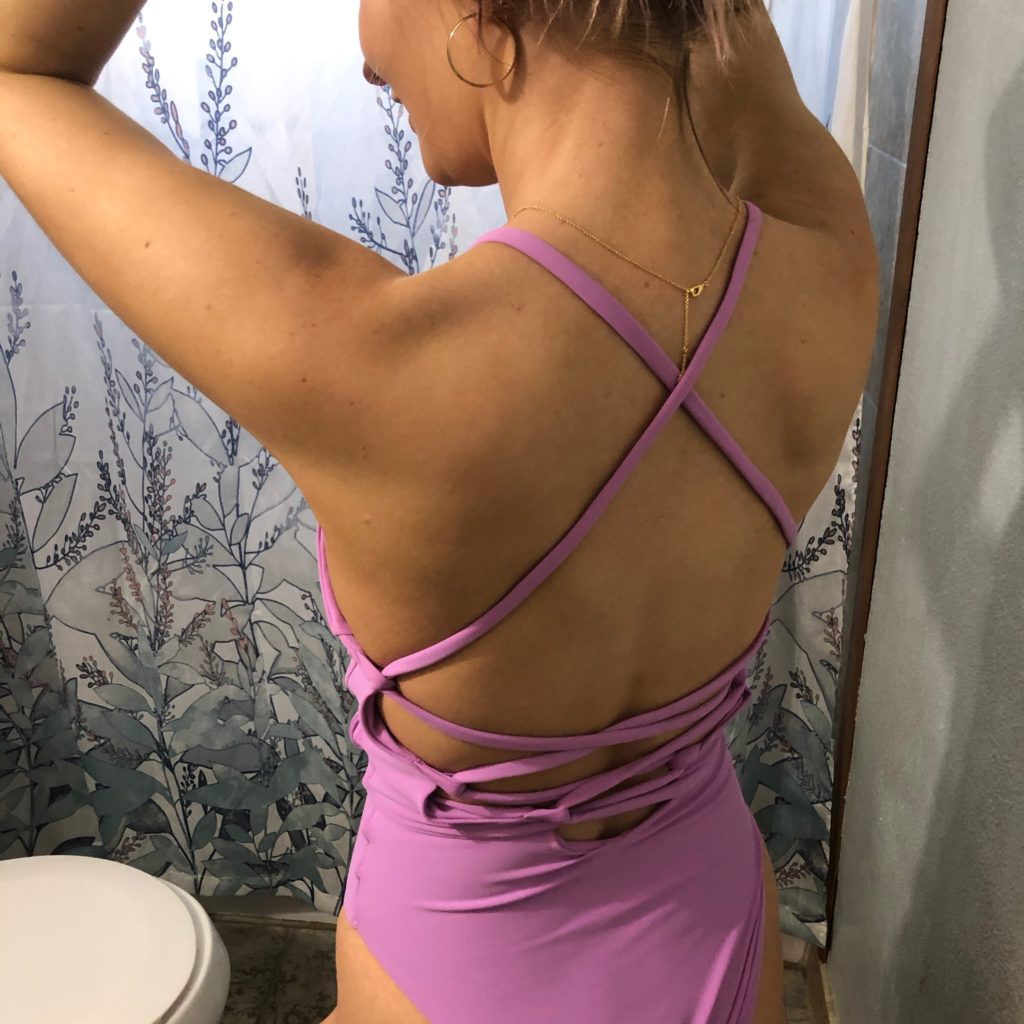
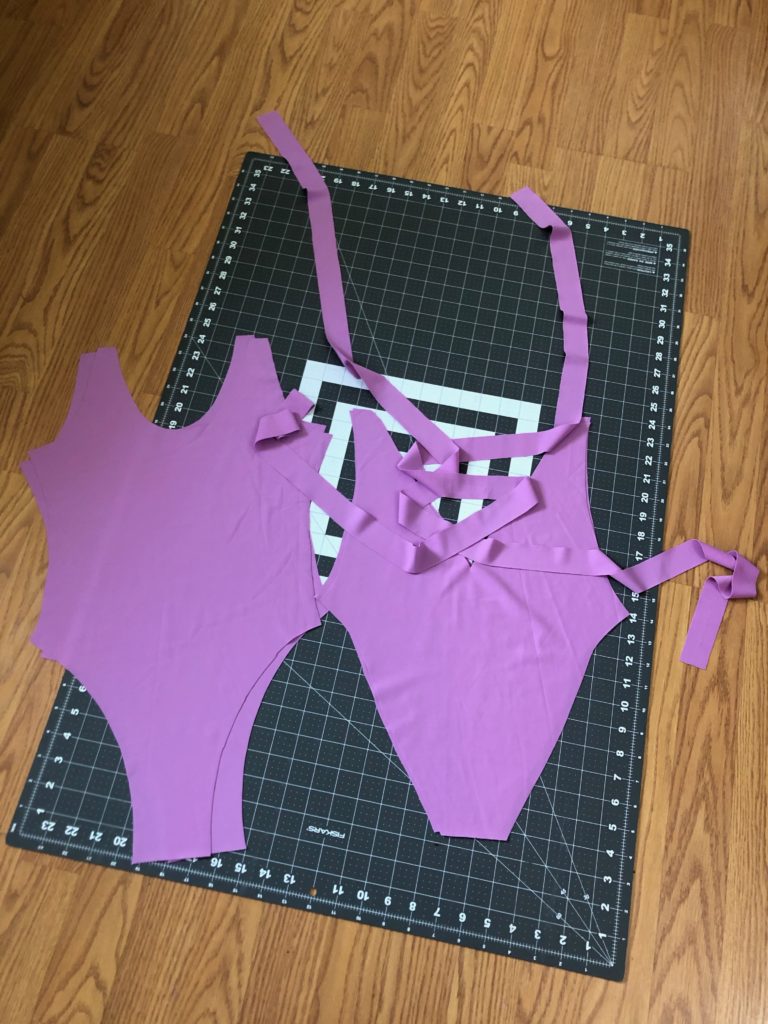
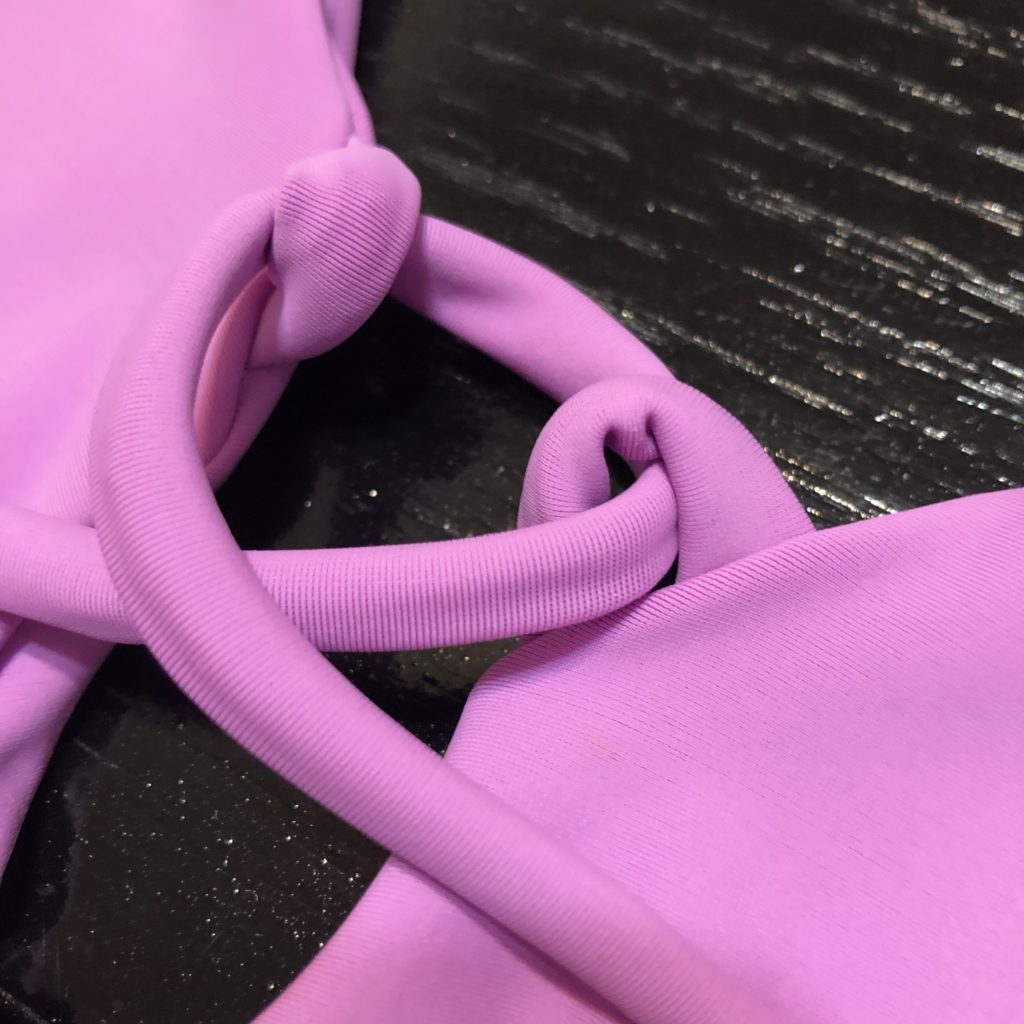
After all the pieces are cut we can get ready to sew. My first step was sewing all the long strap pieces right sides together using 1/4 swimwear elastic and a zig zag stitch. With my loop turning I pulled those through and set aside. Since this was a design I wasn’t sure would work I wanted to start with the back. Grabbing one back piece I marked the back about where I wanted my loops to be sewn. When doing your marking be sure to consider your 1/4in seam allowances. My loop pieces measured approximately 2in. I started my first loop about 1in from the top edge. The middle loop sits 3in between the top and 3in between the bottom. There is about 2.5in gap from the last loop to the base of the cut out back.
Once you have the measurements of where you want your loops you can begin to tack those down. You’ll want to have your loops all turned in the same direction and facing towards the right side of the suit. When we place the right sides of the back pieces together, your loops should be sandwiched between your two back pieces. All of the sewing will be done with 1/4 swimwear elastic and a zig zag stitch, unless mentioned otherwise! Sewing the back pieces right side together I started with the back curve where the loops are and then sewed the side leg seams together. Leaving the sides unsewn and the gusset area unsewn.

Moving onto the front piece, right sides together, I sewed the neckline and shoulder seams. You’ll have a gap where the neckline and shoulder seam meet so we can insert our straps later. You may want to leave a small gap in your shoulder seam stitching to flip your suit out later, or you can seam rip one like I did. Next I sewed the leg side seams together. The side seams and the gusset area are not sewn together, just like the back piece. OK now you’ll want to grab your two long shoulder straps and insert those into the strap area. I used a zig zag stitch a couple times across this area for reinforcement with no elastic. Once your straps are sewn in you may want to tie them in a little bow to keep them out of the way.
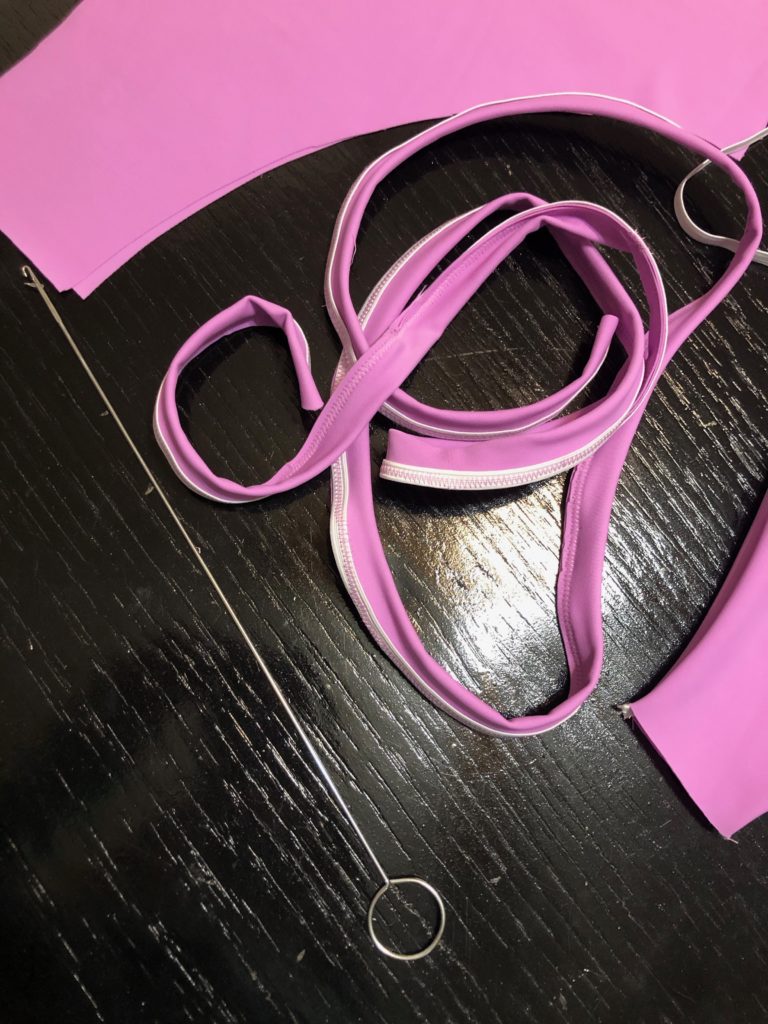
Leave the front of the suit how it is, inside out, with right sides still together. Take the back piece and flip it so you can see the correct side of the fabric. If your loops turn a certain way you’ll want to make sure you’re facing the right side the back with the right side of the inside of the front. So this is where the magic starts we going to slip the back piece into the front piece. Right sides will be facing together. You will want to line up your gusset pieces and pin. You will be sewing through four layers of fabric here. I use a zig zag stitch across this area several times with no elastic. You’ll want to be careful when pinning to not turn the suit. Make sure its laying flat and you can begin to pin the sides. I used elastic on the sides and sewed. At this point if you did not leave a small gap in your stitching somewhere along the shoulder seam you can seam rip a section. Probably a least 2in or so and we can use this hole to pull the suit to right side.
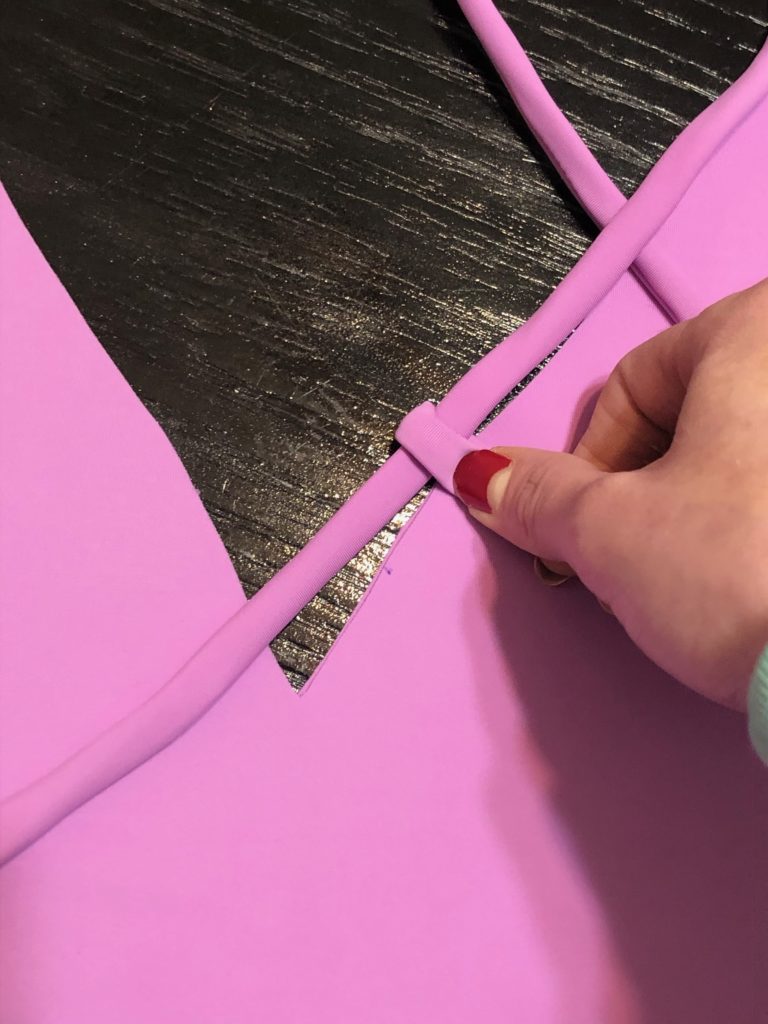
Once you suit is pulled through fingers crossed everything went well! After that you can use a ladder stitch to close up the hole. I crossed my shoulder straps before the top loop and then crossed as normal. Once through the bottom loops I crossed the straps and tied in the front. Thank you so much for reading this long post and I hope that helped someone out!